
How to Wire a Lamp Socket

Updated: Oct. 16, 2023
Revamp an old lamp or build one from scratch with this guide on how to wire a lamp socket!
30 minutes
Beginner
$10.00
Introduction
When I was little, my mom had an old lamp that sat on an end table. It had a fancy shade and a beautiful tasseled pull cord, and when I moved into my new house I knew it would look great there. When I asked what happened to it, she said she gave it away once it broke. Argh!
If you have an old lamp that no longer works no matter how many bulbs you try, don't throw it out. Try this easy, inexpensive fix first. For less than $10, you can replace the socket and hopefully make your lamp last much longer than my mom's did. (If you're feeling particularly handy, you can even build your own lamp.)
Before we start, let's talk about the wiring, and how lamp sockets work.
If you peek inside the socket, you'll see a little tab at the bottom. That's the "hot" part, where the power comes in from the electrical circuit feeding your lamp. The silver threaded socket (the part the bulb screws into) is the grounded, or "neutral," part of the circuit. The cord running from your wall receptacle to the lamp has a hot and a neutral wire, too, and it's important to match it to the lamp correctly. (Don't worry, I'll show you how.)
Why? Safety. If you attach the hot wire from the cord to the threaded silver socket, it will always stay hot, even if the lamp is off. The entire lamp could get electrified, especially older models with cardboard insulating sleeves, increasing the chance of electric shock. That's why the little hot tab is buried at the bottom of the socket. When the bulb is in place, there's no way for anyone to touch it.
Before starting this project, unplug the lamp from the wall and disassemble the socket from the lamp. (Take a photo or two to help you remember how it goes back together!) Lamp sockets are available at any lighting or home improvement store and online, and come in a variety of styles and switch types (pull chain, twist knob, push-through and more).
Let's get started.
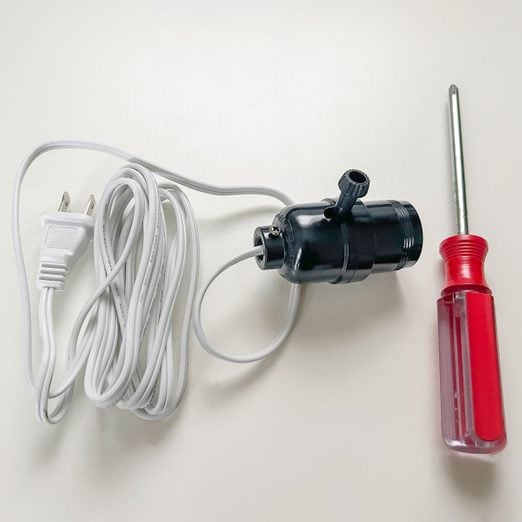
Tools Required
- Screwdriver
- Wire strippers
Materials Required
- Lamp cord
- Lamp socket
Project step-by-step (5)
Identify hot and neutral
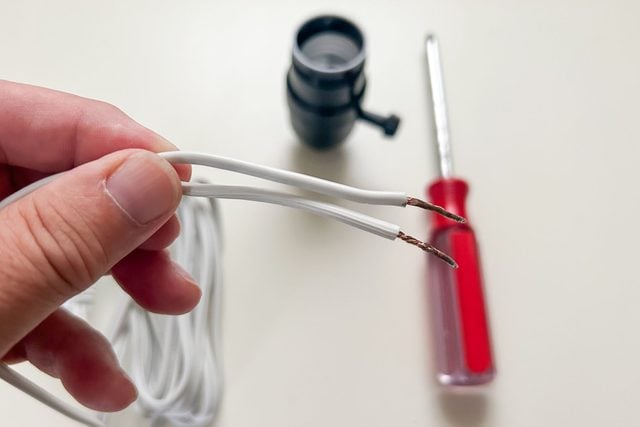
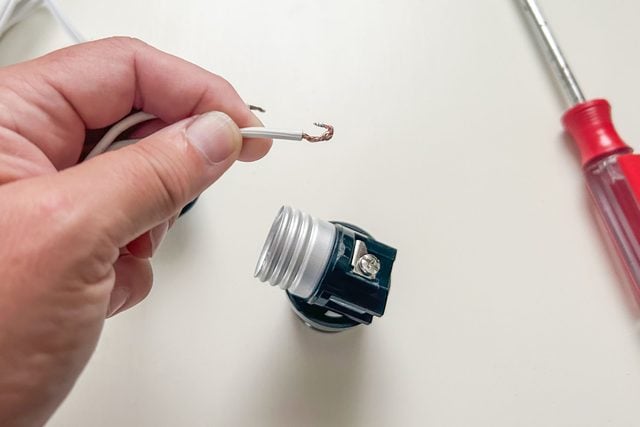
- Examine the lamp cord.
- The neutral will have raised ribs or other markings down the length of the insulation.
- The hot wire is always smooth.
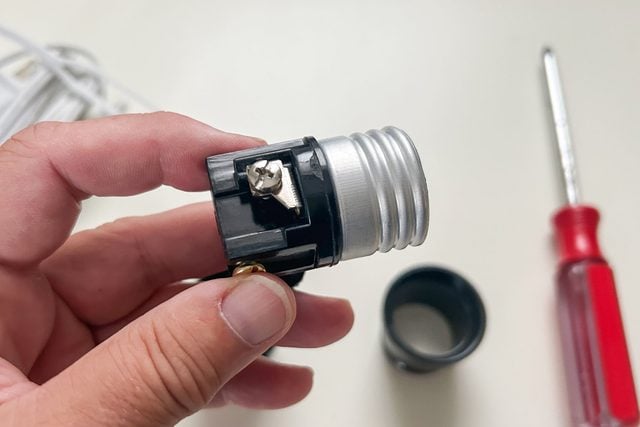
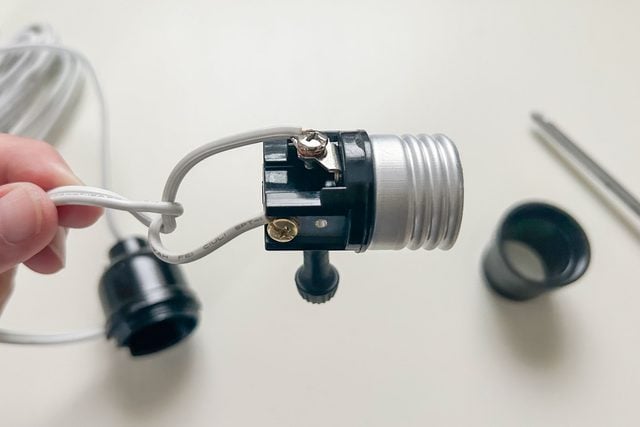
- Examine the screw terminals on the new lamp socket.
- The brass screw is for the hot wire.

-
- The silver or black (anything but brass) is for the neutral wire.
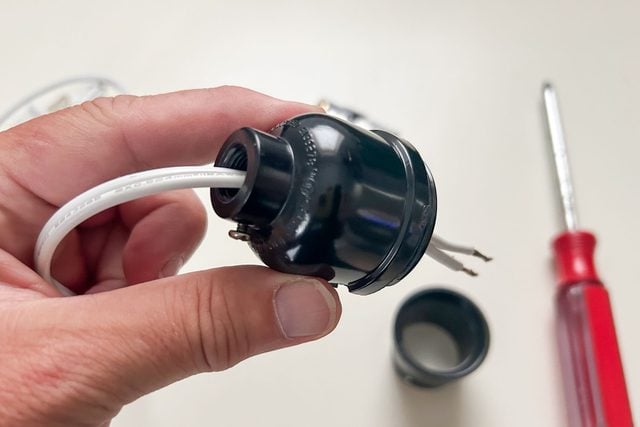
Disassemble the lamp socket
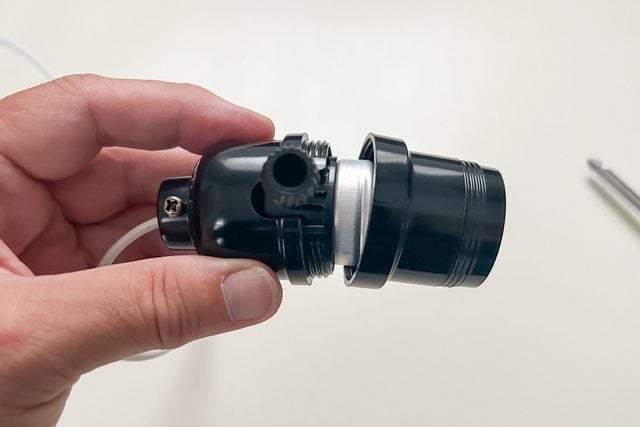
- Unscrew the new lamp socket. Most likely there will be three pieces: top and bottom sleeves, and the actual socket connection.
- Set aside the top sleeve.
- Thread the non-plug end of the lamp cord through the narrow end of the bottom sleeve and pull it through.
Prep the lamp cord
- Tie the ends of the lamp cord into a half knot (cross the ends and tuck once).
- This helps with strain relief once the lamp is wired.
- Snip off the ends of the old lamp cord wires. If using a new cord, they will come stripped already.
- Trim about 1/2-in. to 3/4-in. of insulation off the ends with wire strippers.
- Twist the ends. Then make a hook in each end of the exposed wires.
Make the connections
- Loosen the screws on the lamp socket.
- Hook the ribbed neutral wire clockwise around the silver screw and tighten.
- Hook the smooth hot wire clockwise around the brass screw and tighten.
- Tug on the wires to make sure they’re secure.
Reassemble the lamp socket
- Slide the bottom up over the cord and fit the socket into it.
- Re-attach the top sleeve to the bottom, enclosing the socket apparatus.
- Reassemble the lamp, add a bulb, plug in and turn on!
Originally Published: June 20, 2017