
How To Repair the TV Remote
Updated: Sep. 11, 2023
Is your TV remote not responding properly? Here's how to restore your remote to like-new condition.
Less than 1 hour
Beginner
Less than $20
Introduction
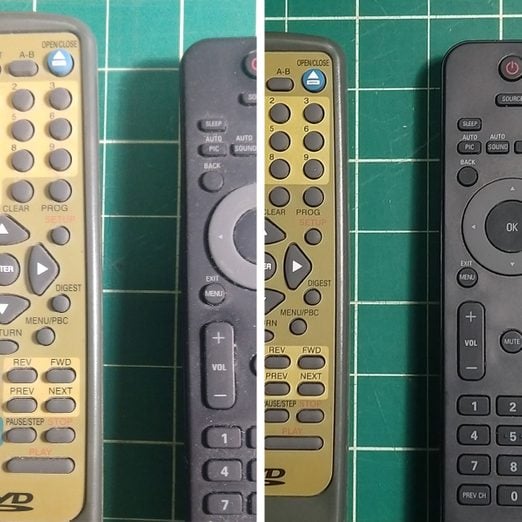
To show you how to bring a television remote back to life, I found two with issues: one from a non-functioning 25-year-old DVD player, and a Philips TV model with buttons stuck in the down position.
While designs differ with different manufacturers, the basic concepts shown here will work for remotes from this year's Amazon Fire stick to a decades-old Zenith. Common differences include the presence or absence of screws, and buttons that press physical switches or conductive pads. (Popular modern models like Panasonic and Samsung TV remotes should fall right in line with the models shown.)
This project takes you through three levels of repair: battery replacement, cleaning and conductive paint touch-ups.
A quick note on two of the tools used in this project.
Prying tool: You'll need something to open the remote case. Electronics repair kits include plastic pry tools, but you can use any thin, semi-rigid piece of plastic. I typically go with guitar picks or, as in this case, expired shopper rewards cards. Don't use anything metal because it's easy to damage the case.
Isopropyl alcohol: For the cleaning solution, I suggest 90% or higher isopropyl alcohol. This becomes more important the closer you get to the circuit board. (You can likely safely clean the remote's exterior with household cleaning supplies, as long as you don't saturate it.)
Note that many people call isopropyl alcohol "rubbing alcohol." Some rubbing alcohols include additional ingredients. Stick to plain isopropyl alcohol so you don't inadvertently leave chemicals inside the remote when you're done cleaning it.
Project step-by-step (9)
Check the batteries
- Remove the batteries and pop in new ones.
- It may sound obvious, but it’s often the best and easiest fix for a wonky remote.
- If the remote still isn’t working, remove the batteries and move on to the next steps.
Clean the outside
Everyday use can interfere with the buttons. Basic cleaning is the next step.
- Use isopropyl alcohol to clean the outside of the remote.
- Be sure the batteries are out first.
- Allow any liquid cleaner to evaporate, then replace the batteries and test the remote.
- If it’s still not working, it’s time to open it up and assess the situation.
Open the remote
- Remove any screws.
- Search carefully — they will typically be hidden for a sleek design.
- Look behind the batteries and underneath any top-level panels. Amazon’s Fire stick has two batteries beneath the directional control ring on the remote’s face.
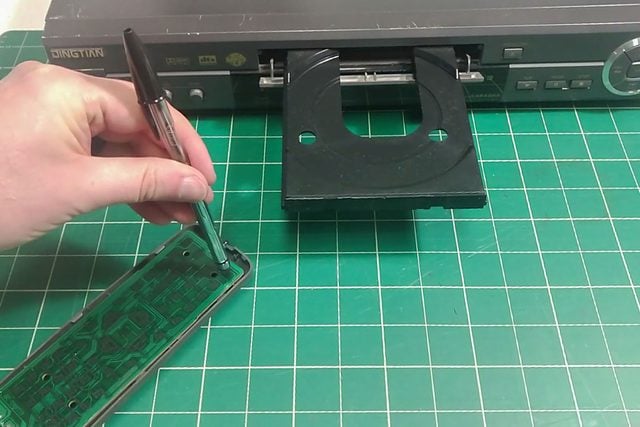
- Press your prying tool into the seam separating the two halves of the remote.
- Work your way around the edge, separating the halves.
- Every remote is set up differently, so you’ll need to feel your way along.
- Remember: The point is unlatching the snap-fit plastic, not wrenching it apart with brute force.
- Patience is key. Remotes are not designed to be opened easily, but most will with slow, consistent pressure.
- I got too aggressive opening the Philips remote and chipped the back end. Don’t be me!
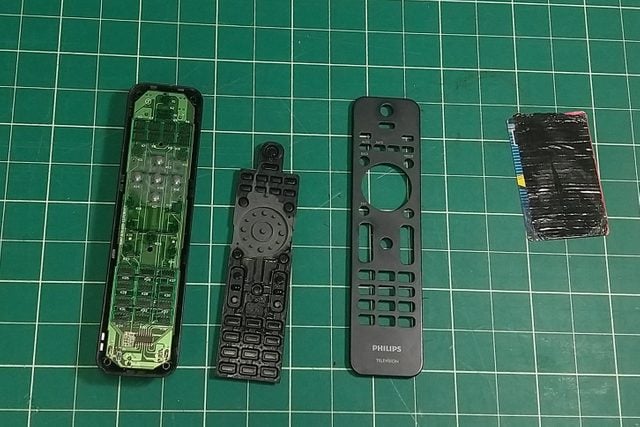
- Once you’ve opened the remote, separate the rubber control pad from the hard plastic case.
- You can remove the circuit board from the case, but this isn’t necessary unless your remote is particularly dirty.
Clean the inside
- Examine the rubber pad and circuit board to see how much dirt has accumulated.
- My Philips TV remote showed classic dirty remote issues. It clearly had some kind of beverage spill, plus a dog hair on the circuit board.
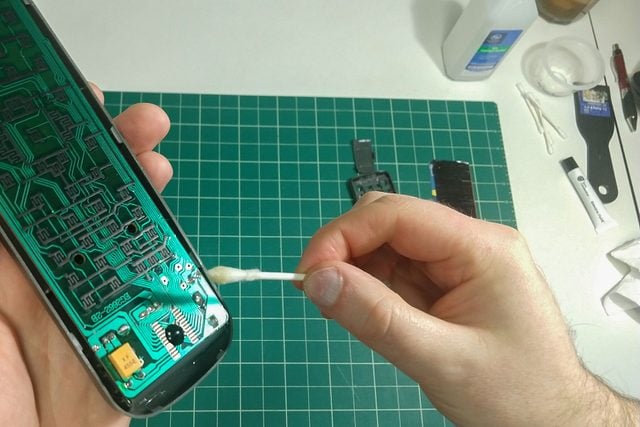
- Use 90% or higher isopropyl alcohol and a lint-free rag or cotton swabs on the rubber pad and circuit board.
- If using cotton swabs, be careful to not leave stray cotton fibers behind.
- Clean the top of the rubber pad as well as the holes in the plastic case.
- Clean the circuit board if needed.
Test the conductive pads
- Examine the circuit board to see if it uses conductive pads or physical switches.
- Some remotes use one or the other, and some a combination of both.
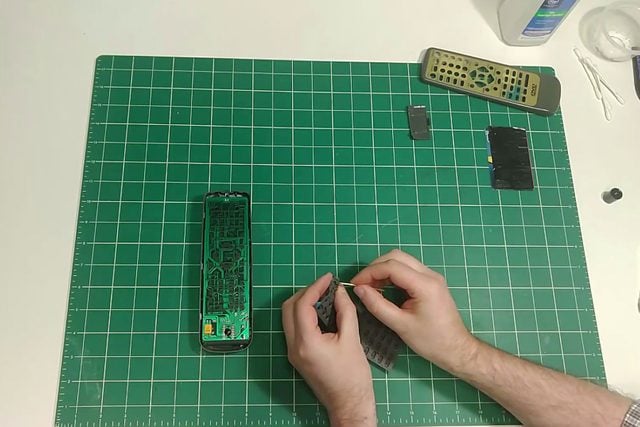
- In the photos, you can see both types of buttons.
- The directional control on the Philips remote is physical, while the rest of the buttons use a conductive connection.
- If the remote has conductive pads, test them by carefully reinstalling the batteries and pressing the circuit board’s sensors with a tablet stylus.
- If the remote functions while using the stylus but not with the rubber buttons, you can try repairing it with conductive paint.
- If the remote still doesn’t work with the stylus, the circuitry may be damaged, and it’s likely time to buy a replacement.
Paint the buttons, as needed
The back of the rubber buttons contain tiny amounts of conductive material. When pressed to the circuit board, they complete the circuit and activate the control. These conductors can wear off over time. By reapplying conductive material (like conductive paint), you can breathe new life into the remote.
- Apply a thin layer of conductive paint.
- I used a toothpick.
- The trick is applying enough paint to create a conductive connection, but not so much it will come off and stick to the circuit board.
- Let the conductive paint dry per the manufacturer’s instructions.
- When it loses its bright sheen, it’s dry to the touch, but will likely need another hour or two to fully cure.
- I waited overnight to be safe.
Test and repeat, as needed
- If you put the paint on too thick, it can cling to the circuit board, causing issues with performance. If this happens, clean off the circuit board and the back of the remote button and try again.
- The right thickness of conductive paint will depend on your specific remote and paint, so you may need a couple of attempts to get it right.
Reassemble
- Once the remote is clean and functioning properly, reassemble it.
- Place it back together and snap the remote case shut.
- At this point, you’re all set to enjoy your favorite shows!
Repair, as needed
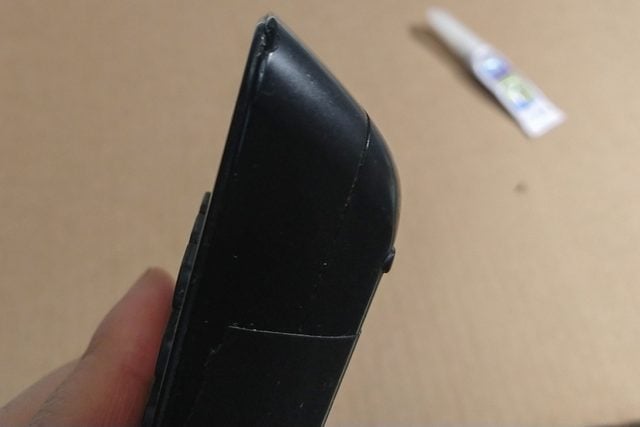
If you chip the edge of your remote during disassembly like I did, you’ll need to perform a quick patch. I applied a bit of super glue, then pressed the chip back into place.
Ever wish you could hide your TV? Here’s how!