How to Save Money: Replace Brake Rotors
Updated: Apr. 25, 2023
A couple weeks ago, I drove my wife’s car for the first time in a while.
A couple weeks ago, I drove my wife’s car for the first time in a while. When I applied the brakes from high speeds, the steering wheel shook a lot. I knew it was time to replace the rotors. She has a 2007 Chevy Malibu with 113,000+ miles on it and we have never replaced the brakes, which is well over the recommended time before changing them.

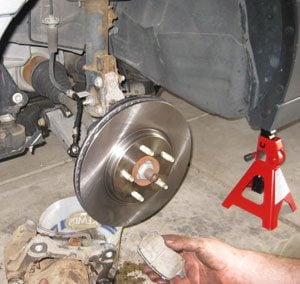
Replacing brake pads and rotors is not a hard or long DIY job. However, this time, it was time consuming. I went to the local parts house, and bought two front rotors and brake pads. I took them home, put her car on jack stands and started taking the old ones off. The rotors were badly scarred from the worn brake pads. But they hadn’t started making that high-pitched squeal of metal on metal when you brake. Since I had the car up on stands, I decided to go ahead and rotate the tires. Guess what? The back ones were just as bad. So I make another trip to the parts store. Tip: If you wait that long to replace your brake pads, just go ahead and buy all four rotors, pads and the tools mentioned here. It will save you time.
I came back home and took the back ones off. The piston on the back calipers needed to be compressed, so I took my C-clamp (one with a straight handle) and twisted it on the first and slowly turned the handle and the piston slowly turned and walked in. Not so bad. I get to the right rear and my clamp wouldn’t compress the piston, even after taking the brake line off and draining the fluid out of that caliper.
Back to the parts store I went. I bought a C-Clamp with a “T” handle, a bottle of brake fluid and a one-man bleeder kit. I bought the small bottle of fluid thinking that wasn’t much fluid that ran out. Got home for the third time, used the 9 inch C-Clamp and compressed the piston and put everything back together. Time for a test drive. Took the car for spin to test the brakes and everything worked perfectly. However, the small bottle of fluid wasn’t enough. The brake light wouldn’t go off. Back to the parts store. The entire job cost me $250 in parts and tools and six hours of my time but that was a lot cheaper than the $750 price tag my mechanic would have charged me.
– Tim Davis, Digital Editor
For more tips and information on doing your own brake job check out these articles.
DIY Brake Tips