How to Install Composite Decking
Updated: Apr. 05, 2022
Learn how to build a deck with composites and other rot-resistant materials for beauty and longevity.
Introduction
Expert deck builders show you how to install Trex decking like a pro! Get step-by-step instructions (with pictures) & pro tips from our composite deck experts!Tools Required
- Chalk line
- Circular saw
- Corded drill
- Drill/driver - cordless
- Miter saw
- Power plane
Build Decks Using Composite and Other Low-Upkeep Materials
Your deck should be a place to relax, not a painful reminder of those looming weekends you’re going to spend sanding, painting and staining. So if you’re in the planning stages for a new deck, consider alternatives to wood and check out some composite deck designs.
You can build yourself a low-maintenance deck using the same tools and similar techniques as you would a wood deck. And most parts of a deck are now available in composite material. But there are differences between low-maintenance and wood products. We asked our pros for some tips to help DIYers avoid expensive mistakes.
Don’t know what your deck will look like? Check out this floating, platform deck The Family Handyman built.
Meet Our Experts
We asked Randy Moe from Decks Unlimited, and Bob Januik and Matt Norden from Precision Decks, for some tips on working with low-maintenance deck materials, including Trex. Altogether these guys have built more than 1,000 decks, using every material imaginable. Ten years ago about half their jobs were wood. Today they install low-maintenance materials on three out of four. Plus, check out these 14 DIY deck add-ons that are seriously cool.
Project step-by-step (12)
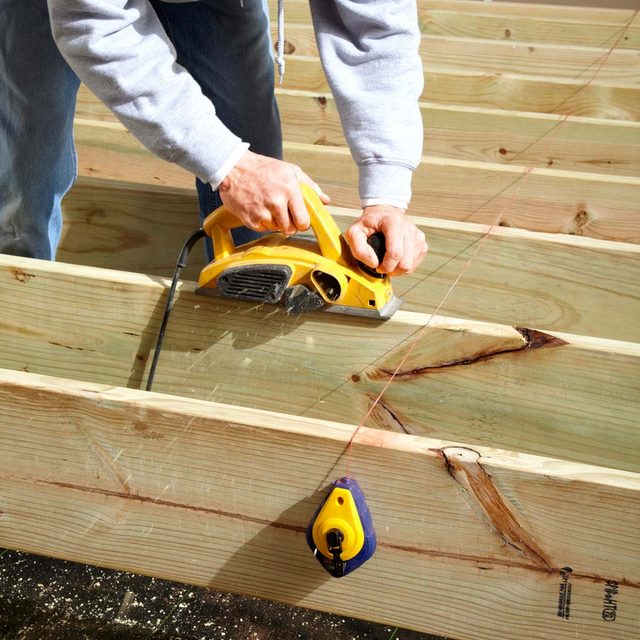
Flatten Joists to Avoid a Wavy Deck
- Most PVC and composite products aren’t as rigid as wood, so they don’t bridge imperfections in the framing as well.
- If some of your joists are higher than others, you might end up with a wavy surface.
- Our pros stretch a string across the deck joists to detect high spots and then plane them down with a power hand planer.
- Pro tip: This might seem like a pain, but it takes less than an hour and pays off with a better-looking deck.
Beware of Dark Colors when Choosing Composites
- Boards with dark colors can get blistering hot when the sun is beating down on them.
- If you like to go barefoot, consider a lighter color.
How to Install Hidden Deck Fasteners:
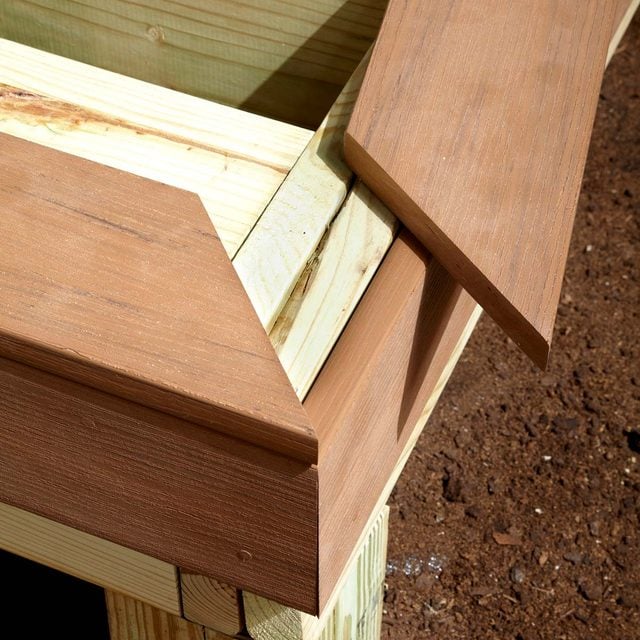
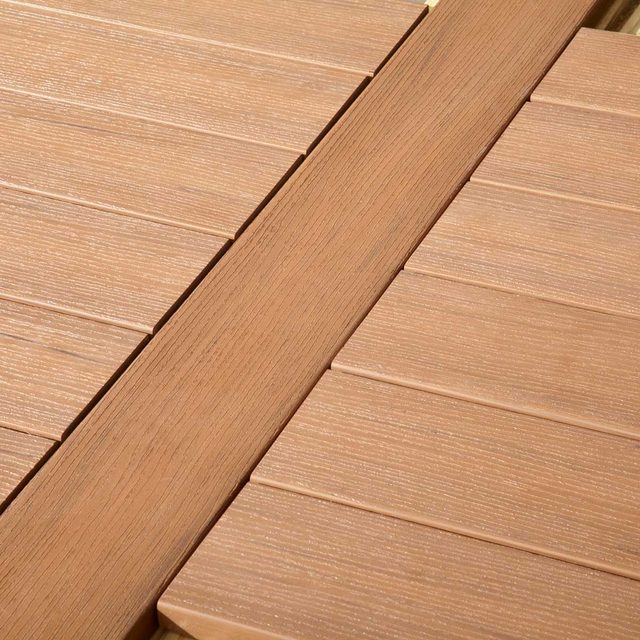
Hide Composite Ends
- Many PVC and Trex composite decking products are not the same color all the way through, so you’ll want to cover the ends.
- One solution is to “picture frame” the deck by installing Trex deck boards around the perimeter.
- Pro tip: A picture frame creates a professional look but does require additional framing.
- One way to support the perimeter boards is to add an extra joist 5-1/2-in. away from the outside joist and then install a 2×6 on its side between the two joists.
- Hide composite ends by mitering joints around the deck perimeter.
- Add extra joists for support as needed.
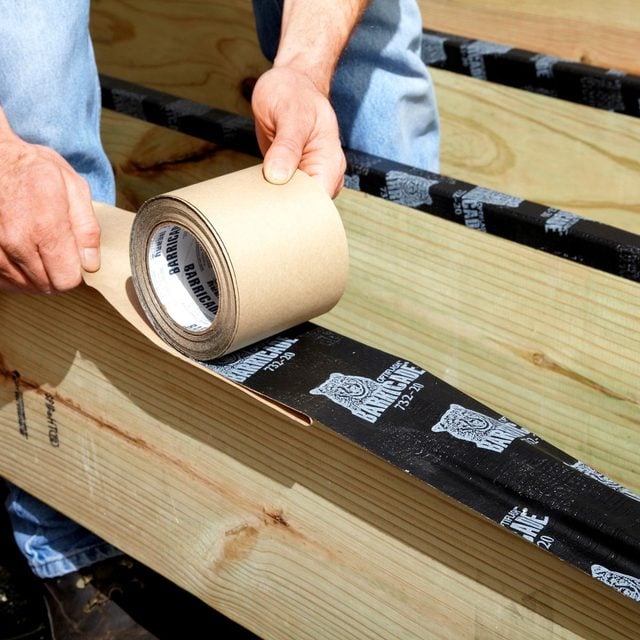
Protect Joists From Rot
- Pressure-treated lumber is rot-resistant, not rot-proof.
- Two places our pros often see deterioration are along the top edge, where the decking traps moisture, and between two joists sandwiched together.
- Rolling butyl tape over the top of the joists will add years to your deck’s framing.
- Choose a dark-colored tape; shiny silver and white are noticeable between the gaps.
- Lay butyl tape over the joist tops to help prevent rot.
Check Deck Joist Spacing
- If you’re planning to replace old wood decking with PVC or composite, measure the deck joist spacing first.
- Most deck joists are centered 16 inches apart, which is the maximum deck joist spacing for most low-maintenance decking.
- If you plan to install your composite decking at a 45-degree angle, your joists may need to be 12 inches apart.
- You also may have to install more stair stringers.
- Check your product specs and talk to your local building official before you buy.
Avoid Random Splices
- Use splice boards to eliminate random splices in long runs.
- If your deck is 24 feet long, don’t use random-length boards and butt-joint them together.
- Install a splice board to create two 12-ft. x 12-ft. spaces instead.
- Your deck will look better and you’ll avoid the frustration of trying to splice the decking over joists.
- A splice board will also require extra framing.
- Do it the same way you would for the perimeter boards (one extra joist and a 2×6 on its side between the outside joist and the extra joist).
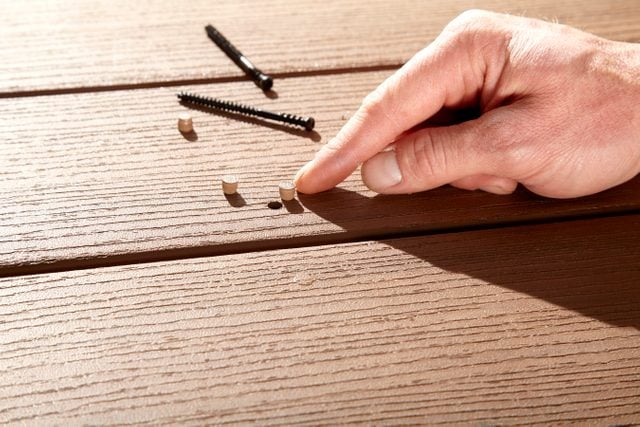
Hide the Screws
- When it comes to fastening PVC or composite decking, all three of our pros like the Cortex concealed fastening system.
- You just countersink the screws using the special bit included with the kit, and hammer in a plug that’s made of the same material as the decking.
- Screw holes virtually disappear, and damaged boards are easy to remove if you have to.
- Pro tip: Features like this make composite deck designs really look polished.
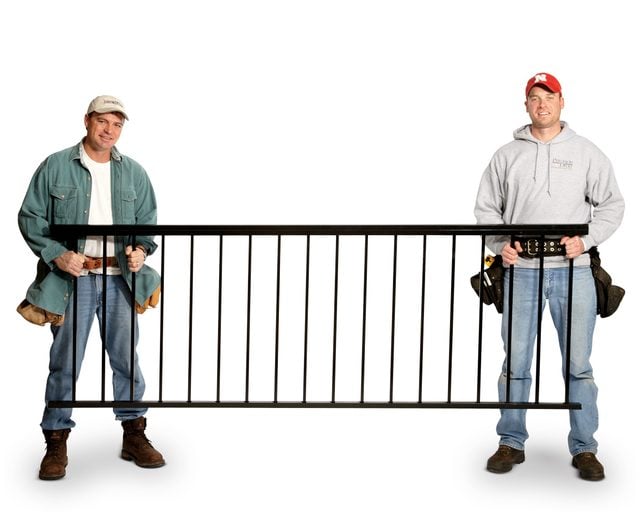
Stair Rails Made Simple
- Stair railings are one of the trickiest parts of any deck project.
- Some aluminum manufacturers offer a preassembled railing that racks to whatever angle you need.
- Just measure the distance between the posts, transfer the proper angle and cut to length.
- If your rails fit into a sleeve, you can cut them with a hacksaw, reciprocating saw or circular saw.
- If your rail ends will be exposed, you may want to invest in an aluminum blade for your chop saw.
- Either way, clean up the ends with a file so you don’t scratch things up during installation.
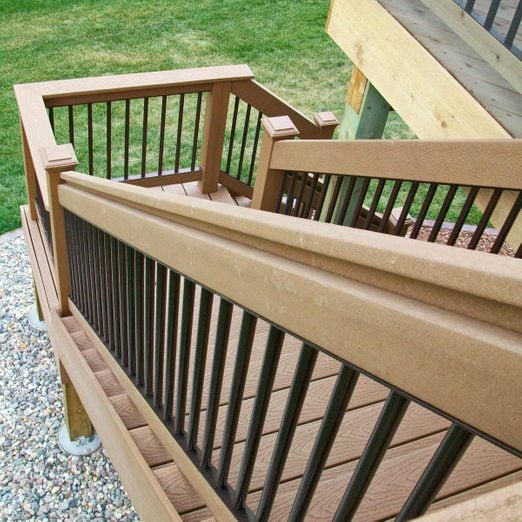
Mix and Match
- You don’t have to stick with one type of product or one look for the entire deck.
- Our pros mix and match all the time: composite posts with aluminum rails, composite rails with aluminum spindles. And don’t be afraid to think outside the box when it comes to color.
- You can install perimeter boards the same color as the railing.
- Choose a post color that’s different from the railing.
- Find a complementary color for your composite deck stairs.
- Have the spindles be a different color than the posts and rails. The possibilities are endless.

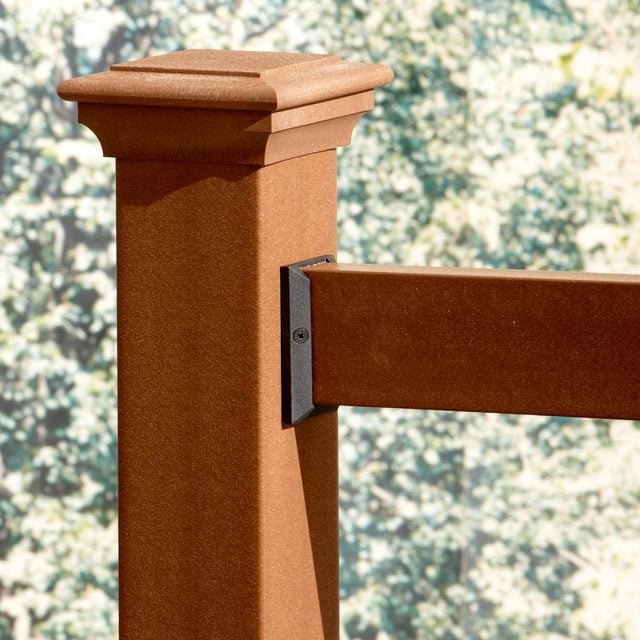
Connectors Make Railings Easier
- Creating a tight fit between a composite deck posts and a rail is difficult — even pros struggle with it.
- Railing connectors make it easy.
- This connector, made by Deckorator, is screwed onto the end of the rail before being attached to the composite deck posts.
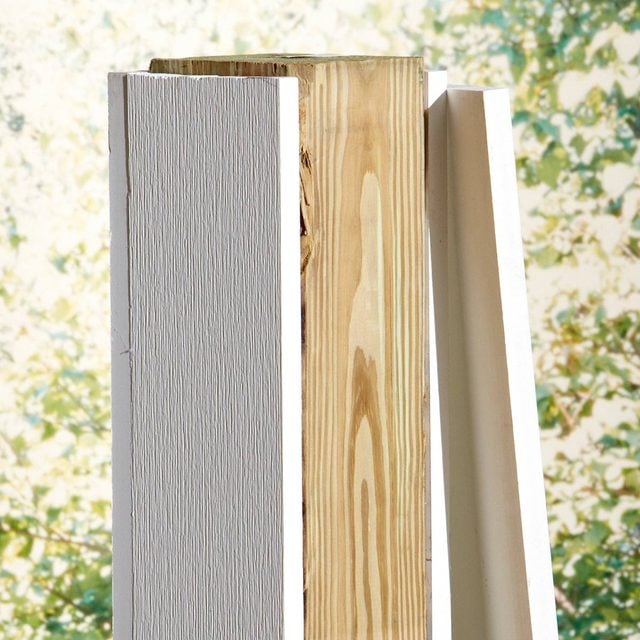
Dress Up Ugly Posts
- If your deck is more than a couple of feet off the ground, you may want to wrap the posts in PVC to match the rest of the deck.
- You’ll need two 1x6s and two 1x8s for each post.
- Pro tip: Our pros avoid material thinner than 3/4-in. because PVC expands and contracts more than wood, and it’s hard to keep the seams together using thinner material.
- Pin the boards in place with a trim gun before screwing them together.
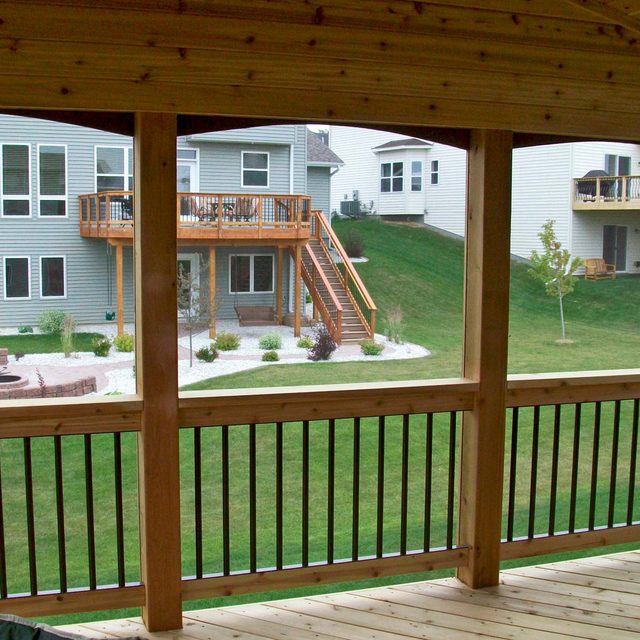
Dark, Round Spindles Improve the View
- Do you know why horse fences are usually white? It’s because dark ones are harder for horses to see. The same principle applies to deck railings and people.
- If you want an unobstructed view, dark spindles are the way to go. And round is better than square.
- A 3/4-in.-diameter round spindle stays 3/4-in. no matter which direction it’s viewed from, but a 3/4-in. square spindle grows to more than an inch when you view it at an angle.