
How to Clean an Engine
Updated: Jan. 30, 2020Add resale value to your car by keeping your engine clean.
Clean up your greasy engine
If you’re a clean freak, you’ve probably been degreasing your engine for years. But if you don’t know how to clean an engine, here are two good reasons why you should do car engine cleaning. First, a clean engine is easier to work on. Second, a clean engine brings more at resale. But you can’t just spray it with engine degreaser and hose it down. We’ll show you how to prepare the engine to protect critical electrical connections. We’ll also give you some tips for car engine cleaning in an environmentally safe way.
Picking a engine degreasing product
Degreasing products come in two types: solvent and water-based. Both types work on greasy engines. And both require special environmental handling once they’re applied—even if the label says “environmentally safe” or “biodegradable.” Because once the degreasing solution starts dissolving the grease, it’s considered hazardous waste.
We prefer solvent-based degreasers as the best engine cleaner because they work faster and seem to cut through heavy grease buildup better than most water-based engine cleaner products. The downside is their strong solvent smell. If you’re sensitive to solvents, choose a concentrated water-based product instead.
To get better “cling” on vertical surfaces, choose either a foam or a gel formula for an engine degreaser (such as GUNK Heavy Duty Gel Degreaser; available at auto parts stores and through our affiliate with amazon.com).
While you’re at the auto parts store, pick up a drip pan and three 3-packs of absorbent mat. We used the inexpensive PIG Universal Medium Weight Absorbent Mat, available at NAPA auto parts stores and tooloutfitters.com.
Warm it up, wrap it up and spray away
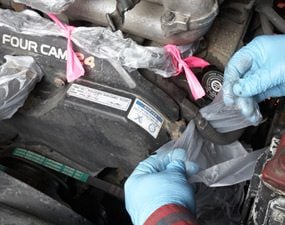
Photo 1: Protect everything electrical
Wrap ignition wires and coils and all electrical connectors with plastic wrap. Then add a flag of fluorescent surveyor’s tape so you don’t forget to remove the wrap later.
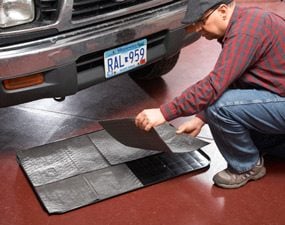
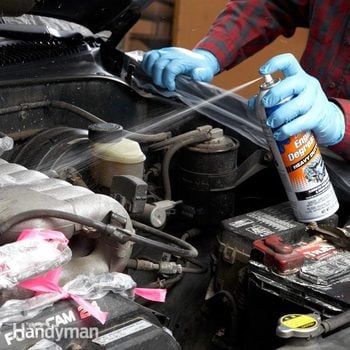
Photo 2: Soak up the hazardous waste
Spread absorbent mats on a drip pan and slide the pan under the engine.
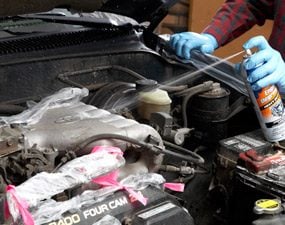
An engine degreaser works best when the grease is warm and soft. So start the engine and let it run for about five minutes for best engine cleaner results. Then shut it off and let it cool down until you can safely touch the exhaust manifold. Never spray engine cleaners (especially flammable solvent types) on a hot engine.
If you’re using a concentrated water-based engine cleaner product, test it on a greasy spot. If it doesn’t cut the grease fast enough, add more concentrated engine degreaser to the brew.
Keeping up with car maintenance can help extend the life of your car. Because have you ever searched: How much does it cost to replace an engine? It’s not pretty.
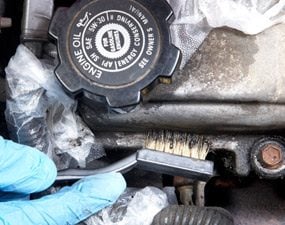
Next, seal all the electrical connections (Photo 1). Then set the absorbent mats under the engine to soak up the runoff (Photo 2). Prep the worst areas (Photo 3). Then apply the degreaser (Photo 4). Aim carefully to prevent the overspray from reaching painted areas. Rinse lightly with water and remove the plastic wrap. When you’re done, place the wet mats in sunlight to allow the water to evaporate. Then dispose of the mats following local regulations.
For extra protection, spray an engine protectant (GUNK Engine Shine is one brand; available at auto parts stores and through our affiliate with amazon.com) onto the dry engine. The spray imparts a slight shine and a protective layer of grease to make cleanup even easier next time.
Required Tools for this Project
Have the necessary tools for this DIY project lined up before you start—you’ll save time and frustration.
- Air compressor
- Air hose
- Drip pan
- Flashlight
- Knee pads
- Nylon brush
- Wire brush
