
How to Repair and Replace a Refrigerator Icemaker
Updated: Jan. 10, 2023Installing a replacement icemaker is simple.
Install a new icemaker
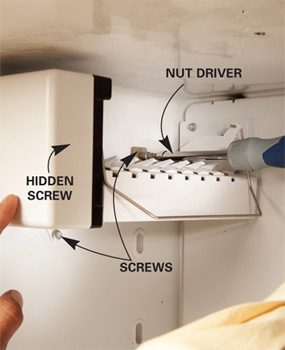
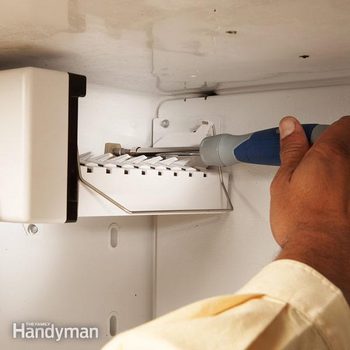
Photo 1: Remove screws on old icemaker
Use a nut driver or a long screwdriver to remove the screws that hold the icemaker in place.
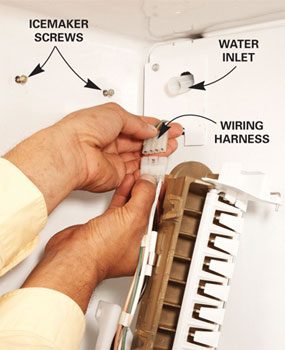
Photo 2: Plug wiring harness together
Line up the wiring harnesses and plug them together before screwing the icemaker in place.
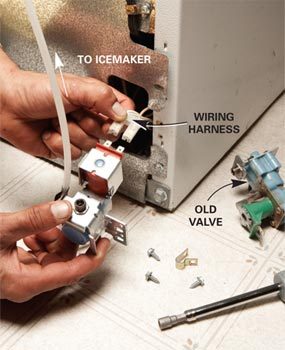
Photo 3: Install new inlet valve
Remove the old inlet valve and plug in the new one, then attach it to the frame.
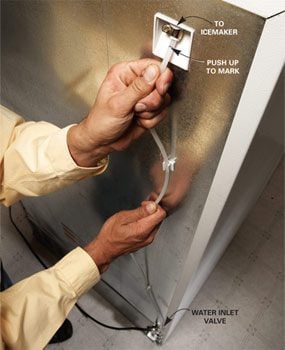
Photo 4: Attach water line
Push the water supply from the inlet valve onto the barbed fitting at the top of the refrigerator.
Ice Maker Troubleshooting
If your icemaker stops working or even has gray ice cubes in it, there’s no need to call the appliance repair service. First, do some icemaker troubleshooting. Locate the saddle valve that’s clamped to the house water supply and turn it off and on a few times to break up any mineral buildup clogging the valve. If that doesn’t work, unplug the refrigerator and remove the icemaker (Photo 1) to make sure the water inlet at the back of the refrigerator isn’t plugged with ice (just heat it with a hair dryer if it is). However, if the water supply isn’t blocked and the refrigerator is older, it’s time to replace the icemaker. According to appliance repair pros, most icemakers break down long before the refrigerator. The good news is that most replacement kits are simple to install.
Locate the model number on the wall of the refrigerator just inside the door, then buy a new icemaker at an appliance store or online (do a search for “appliance parts”).
Unplug the refrigerator and turn the water off, then take the old icemaker out and disconnect the wiring. Plug the new icemaker in (Photo 2), hold it in position and screw it to the refrigerator wall. Pull the refrigerator out from the wall, disconnect the water supply from the inlet valve at the bottom of the refrigerator, then replace the old inlet valve (Photo 3). Inlet valves should be replaced when the icemaker is replaced, and are usually included with replacement kits. If not, order it separately.
Before you push the refrigerator back, turn the water on and check for leaks.
Required Tools for this Project
Have the necessary tools for this DIY project lined up before you start—you’ll save time and frustration.
- 4-in-1 screwdriver
- Nut driver
