Sawhorse Plans
Updated: Jan. 20, 2023
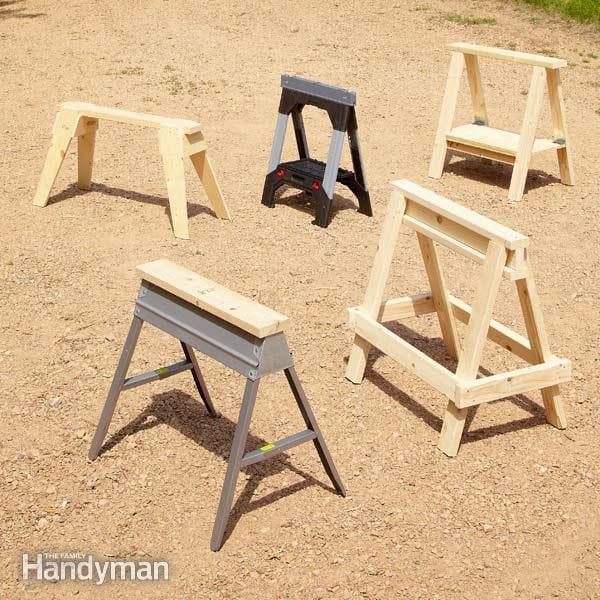
Five great sawhorses for your DIY workshop
Introduction
Sawhorses are an essential construction tool, and this article highlights 5 of the best—3 DIY designs, with complete plans, and two off-the-shelf favorites.Tools Required
- Air compressor
- Air hose
- Circular saw
- Cordless drill
- Framing square
- Hammer
- Hearing protection
- Miter saw
- Safety glasses
Materials Required
- 16d nails
- 1x6
- 2 x 4s
- 2-in. screws
- 2x6
- 3 1/2-in. hinges
- 3-in. screws
- 3/4-in. plywood
Sawhorses are an indispensable part of your DIY workshop. Here are five of our favorites, including some you can build yourself.
Project step-by-step (9)
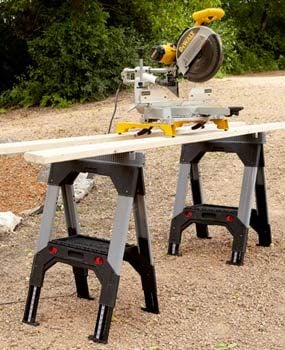
1. A Quick-and-Dirty Sawhorse that’s Rock-Solid
- Buy two 12-foot 2x4s and one 10-foot 2×4.
- With 16d nails or 3-inch screws, assemble the three boards that make up the I-beam.
- Attach the legs, using a framing square to square the legs to the beam.
- Attach the rails last — you’re done, so get to work!
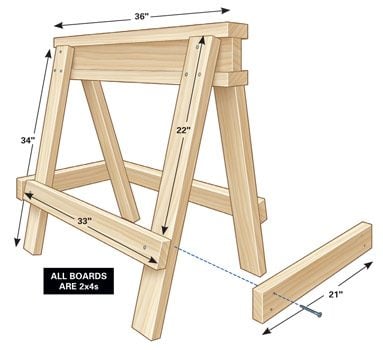
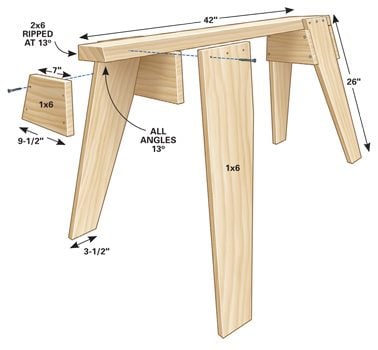
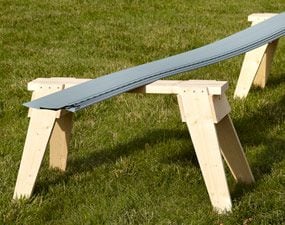
2. A True Classic that Will Last a Lifetime—or More
Here’s a design that’s been around for a hundred years — maybe longer. It’s low, so you can use your knee to hold down your work. The compound miters make this one a little trickier to build than the others, but if you take one component at a time and label them as you go, in a couple of hours you’ll have a pair of sawhorses that your own grandkids will be proud to replicate someday.
- Buy one 8-foot 2×6 and two 8-foot 1x6s.
- Cut the top to length first, then taper the edges on a table or circular saw.
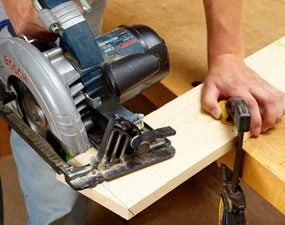
Cut the Legs
- Set your circular saw to cut at a 13-degree bevel.
- Cut the legs to length at a 13-degree angle.
- Mark each piece as you cut it.
- Pro tip: It helps to cut the legs close to their actual size beforehand so you can hold them up and visualize the direction of the cut and the orientation of the bevel.
- After cutting the legs to size, reset your circular saw to 90 degrees and taper the legs.
- Mark the taper line 3-1/2 inches over on the bottom of the leg up to the bottom of the gusset.
- Lay the top board upside down on a flat surface and attach each leg with three 2-inch screws.
Attach the Gussets
- Trim the top and bottom edges of the gusset boards with parallel 13-degree angles.
- Mark one gusset using the sawhorse and copy the other three from that template.
- Set each sawhorse upright and set something heavy on it so all the legs are sitting nice and flat.
- Attach the gussets with four 1-5/8-inch screws.
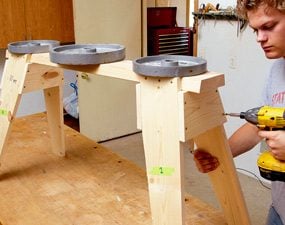
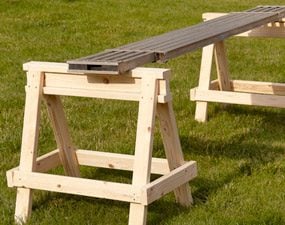
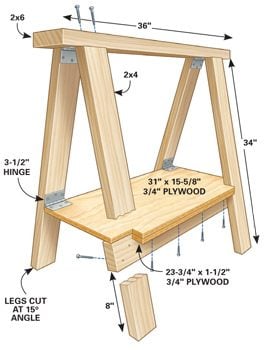
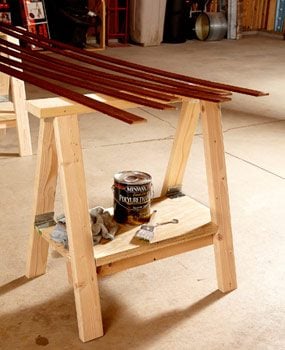
3. A Collapsible Sawhorse with a Built-In Shelf
Some sawhorses have a shelf and some fold up, but this design combines both features.
- Buy a 4 x 4-foot sheet of 3/4-inch plywood, one 8-foot 2×6, one 8-foot 2×4, two 12-foot 2x4s and eight hinges.
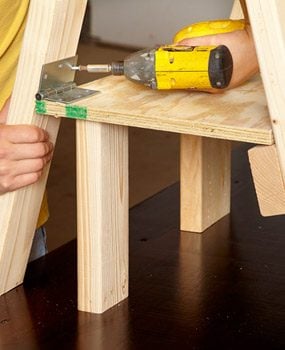
Cut and Assemble the Legs
- Cut the top 2×6 to length.
- Cut both sides of each leg at a 15-degree angle.
- Note: Make sure the angles are parallel.
- Fasten hinges to the ends of two of the legs
- Attach those legs by fastening the hinges to the top piece.
- Attach the other two legs with 3-inch screws.
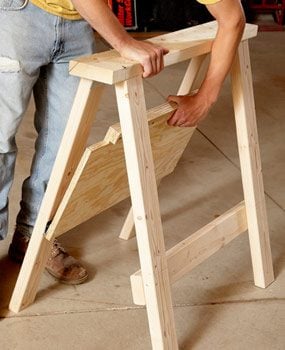
Attach the Shelf
- Cut the 2×4 that supports one side of the shelf.
- Mark a line 8 inches up from the bottom of the leg
- Line up the bottom of the 2×4 with that line, and attach it with two 3-inch screws on each side.
- Cut the shelf to size and notch the two corners using a jigsaw.
- Fasten the hinges to the shelf, then use two 11-1/8-inch blocks of wood to temporarily hold the shelf in place while you fasten the hinged side of the shelf to the legs.
- Cut a 23-3/4-inch x 1-1/2-inch strip of plywood to overlap the 2×4 shelf brace.
- Attach it with wood glue and 1-1/4- inch screws.
- Fasten the hinged side of the shelf to the legs.
- Note: The lip on the shelf holds the sawhorse rigid. To break down the sawhorse, simply lift the shelf.
4. Space-Saving Sawhorses
These collapsible metal sawhorses from EBCO can be hung on a wall or stacked in a corner. And if you have to drag horses from one job to another, these cheap sawhorses are the ones for you. But be careful not to pinch a finger folding them up.
- Avoid scratching the floors with protective sawhorse feet. A set of four costs about $8 at ebcoproducts.com.

5. Sawhorses Loaded with Features
We asked our Field Editors to pick their favorite sawhorse, and the most popular by far was the Stanley FatMax. The top has notches, making it a great place to hold sacrificial 2x4s when you’re cutting up plywood and other sheet goods. Each leg is adjustable, which is pretty handy when you’re working on uneven ground. They have a built-in shelf and fold up relatively flat, making them perfect for storing on the wall.