
How To Install Edging for Plywood
Updated: Feb. 06, 2024
Tips for installing oak and hardwood edgings for plywood.
An hour or less
Beginner
Less than $20
Introduction
We'll show you how to add solid wood nosing to plywood shelves, bookcases and cabinets to cover up the ugly edge that plywood leaves. Applying the nosing will give your projects an attractive, finished edge. This article covers everything a DIYer needs to know to install the nosing.Tools Required
- Belt sander
- Clamps
- Dust mask
- Hearing protection
- Miter saw
- Putty knife
- Router
- Safety glasses
Materials Required
- 120-grit sandpaper
- Flush-trim router bit
- Glue
- Lumber for the nosing
Plywood is a great material for building cabinets, bookcases and shelves. But exposed edges usually look unfinished unless they’re covered with a layer of wood.
While wood veneer tape is one easy way to cover edges, it’s better to glue or nail on a strip of solid wood nosing. It’s good-looking and durable, and it protects vulnerable edges from abuse in high-wear areas.
It also stiffens the plywood, an important feature for shelving. If you make it even wider than the plywood, as we show in this article, the extra stiffness will help keep plywood shelves from sagging. And unlike thin veneer edgings, the wood nosing can be routed to create a decorative edge.
Here, we’ll show you how to glue and clamp wood nosing to plywood, and how to sand the top for a perfectly flush surface and nearly invisible joint. Pipe clamps like the ones we’re using are available at home centers, hardware stores and lumberyards. They’re a good investment. They’ll often come in handy for all kinds of gluing projects around the house.
Buy a length of black iron pipe (3/4-in. or 1/2-in., depending on your clamps) that’s threaded on at least one end to complete each clamp (2-ft. and 4-ft. pipes are the most versatile).
You’ll also need a belt sander fitted with a 120-grit belt to sand the edges flush, but 100-grit sandpaper wrapped around a wood or rubber sanding block will also work. It will just take more elbow grease.
Project step-by-step (11)
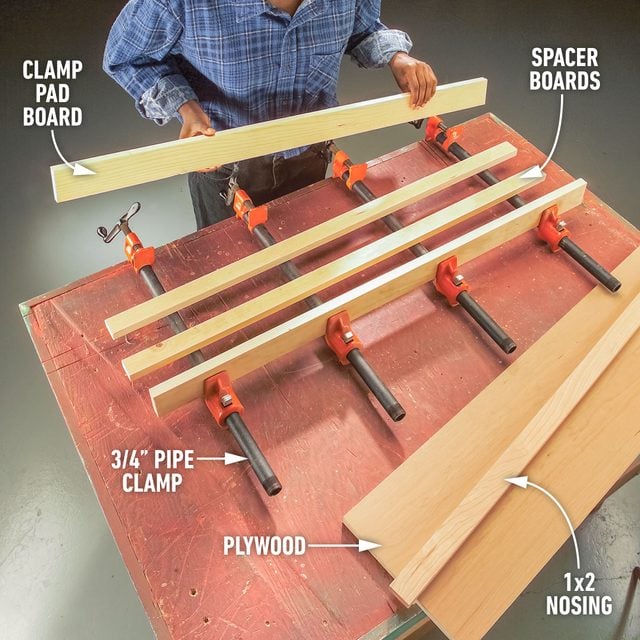
Set up the clamps
Your gluing and clamping operation will go more smoothly if you set up the clamps before you start. That way you can move quickly once you spread the glue.
Any straight scraps of wood will work for the clamp pads. They protect the nosing and plywood from the metal clamp faces and spread the force of the clamps over a wider area. Use spacer boards to hold the plywood above the clamps and flush to the top edge of the nosing.
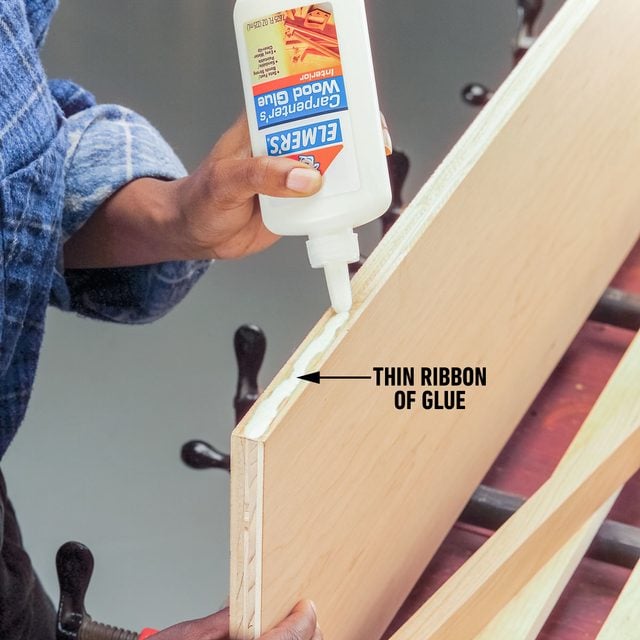
Run a thin bead of glue
You can use any size and thickness of nosing you want. But 3/4-in. thick strips anywhere from 3/4- to 1-1/2-in. wide are easy to find and look great. If you don’t own a table saw, you can cut a clean, accurate edge on plywood by clamping a straightedge to the sheet and using it as a guide for your circular saw.
Hardwood boards for nosing are available at home centers and lumberyards. If you want a 3/4- by 3/4-in. nosing, you’ll have to rip it on a table saw or get it ripped at the lumberyard. Cut the plywood and nosing to length. If you need more precision, leave it slightly long and cut it off later.
Spread a thin layer of glue, about the thickness and width of a shoelace, along the plywood edge.
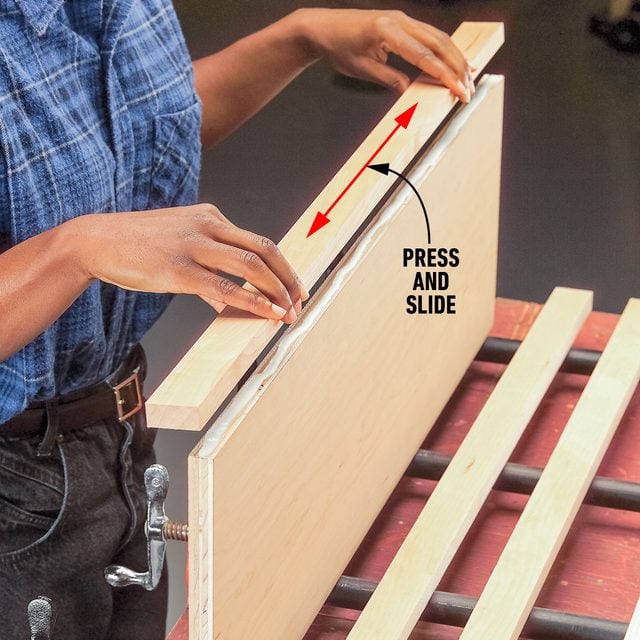
Spread the glue
Press the nosing onto the plywood and move it back and forth to spread the glue.
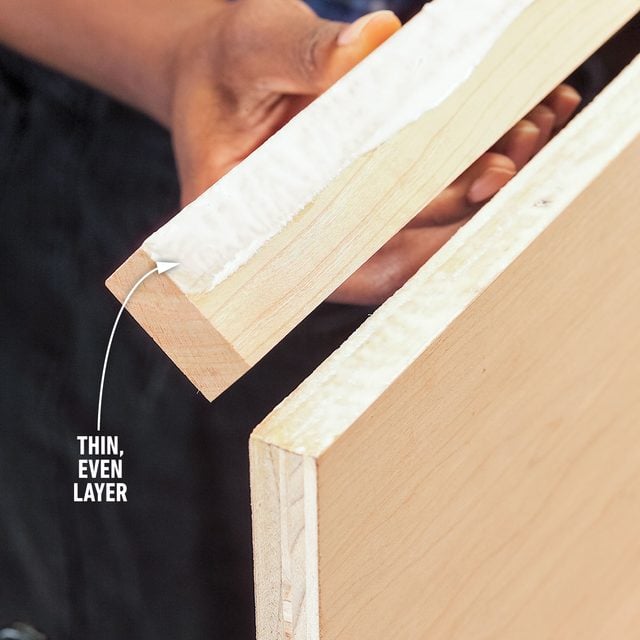
Detail of glue on nosing
A thin layer of glue should completely cover the mating surfaces.
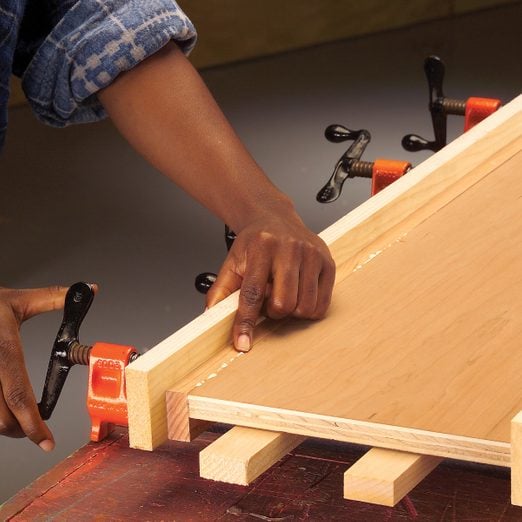
Place the shelf in clamps
Place the shelf and nosing in the clamps. Feel the joint with your fingertip and adjust the nosing until the top is a hair’s width above the plywood as you tighten the clamps.

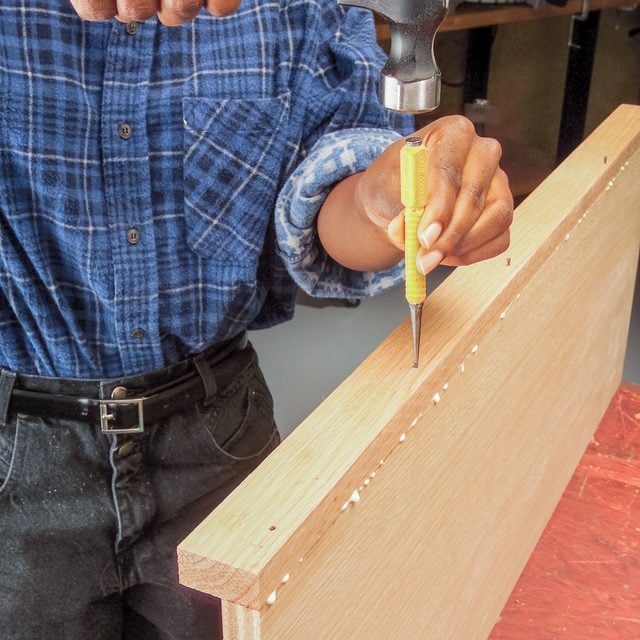
No-clamp nosing
If you’re painting the plywood or you don’t mind the look of filled nail holes, you can simply glue and nail the nosing into place rather than messing with clamps.
Pre-drill holes for the 1-1/2-in. finish nails and drive them below the surface with a nail set. Then fill the holes with wood filler or patching compound and sand them smooth before you paint. Or fill them with matching putty after you stain and varnish the wood.
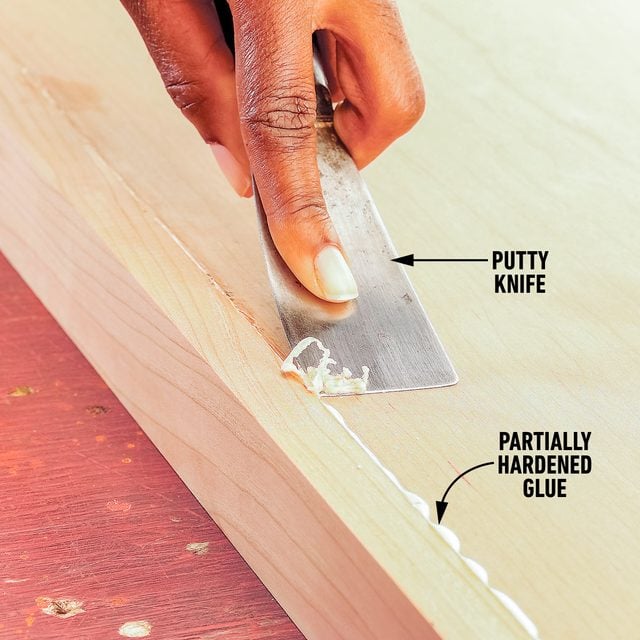
Scrape off excess glue
Let the glue set for about 30 minutes until it’s rubbery and starts to change color. Scrape off the partially hardened glue with a putty knife.
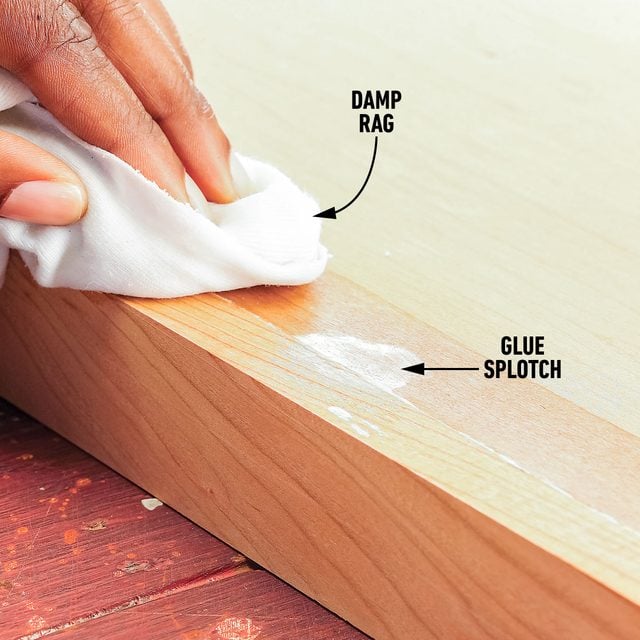
Find and remove glue spots
Moisten the surface with a damp rag to reveal dried glue smudges. Scrape them off while they’re wet. Let the glue set another hour.
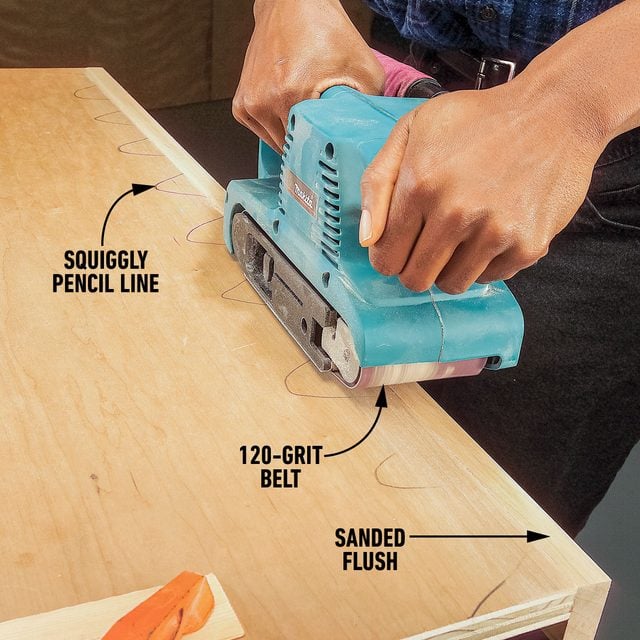
Lightly sand the nosing
The top layer of plywood is a thin layer of wood called veneer. It’s easy to accidentally sand through this veneer and expose the lower layer of wood, which doesn’t match the surface.
Scribble a pencil line along the length of the plywood, overlapping it onto the nosing. Carefully sand the nosing with a belt sander and 120-grit belt until the pencil line disappears and the nosing is flush to the plywood.
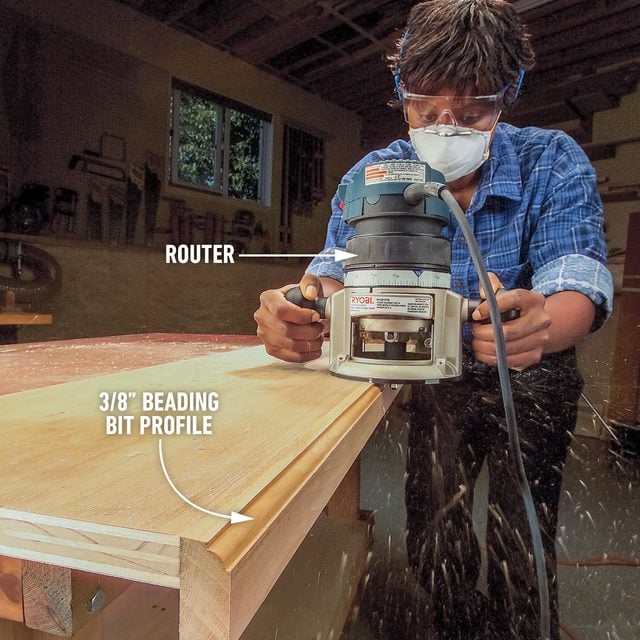
Rout the nosing
Clamp the shelf to the workbench and shape the edge of the nosing with a router and shaping bit.
There are many other methods for getting the nosing perfectly flush to the plywood. Experienced woodworkers use sharp planes and scrapers. A router with a flush-trimming bit also does a nice job. But both these techniques require practice for ideal results.
What to do if you sand through veneer
Over the years, I’ve glued on a lot of shelf nosing. And by far the toughest part is sanding the nosing flush to the plywood.
I can’t tell you how many times I’ve accidentally sanded through the veneer in the process. Usually, it’s because I decided to remove the last bit of protruding nosing with the belt sander, rather than stop and finish sanding by hand.
But even sanding through the veneer isn’t a fatal mistake. In most cases you can still use the shelf, and you’ll be the only one who notices the error.