
How to Stop a Running Toilet and Fix Common Flush Problems
Updated: Dec. 22, 2023
Get a stronger flush—and a lower water bill. Find out how to fix things if your toilet keeps running.
Our editors and experts handpick every product we feature. We may earn a commission from your purchases.
Introduction
Learn the simple four-step strategy that solves 95 percent of toilet flush problems. Stop water from constantly running, give a wimpy flush a boost, and solve other common problems quickly and easily.Tools Required
- Cutting pliers
- Pliers
- Rubber gloves
Materials Required
- Replacement fill valve
- Toilet flapper
Overview
The basics of how a toilet works hasn’t changed much in the last 80+ years. After a flush, water fills a tank, lifting a float that shuts off the water when it reaches a certain level. A lever still opens a flapper to cause the flush, falling back into place when the water level drops.
So, it should come as no surprise that we still have to deal with the same common flush problems from time to time. Sometimes the flush isn’t powerful enough, sometimes the toilet keeps running, and sometimes the bowl doesn’t refill.
The good news is that most of these problems are easy to fix, without having to replace a toilet. You can complete the first three steps in five minutes. That’ll solve most problems. The fourth step is usually easy too, but not always. More on this later. These steps work for most toilets but not for pressure-assist models. Here’s what to do if your toilet won’t stop running.
Project step-by-step (4)
Check the Fill Tube
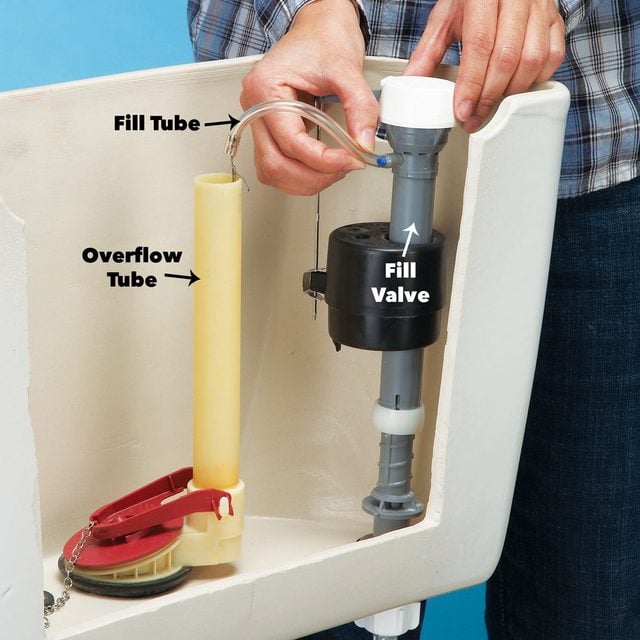
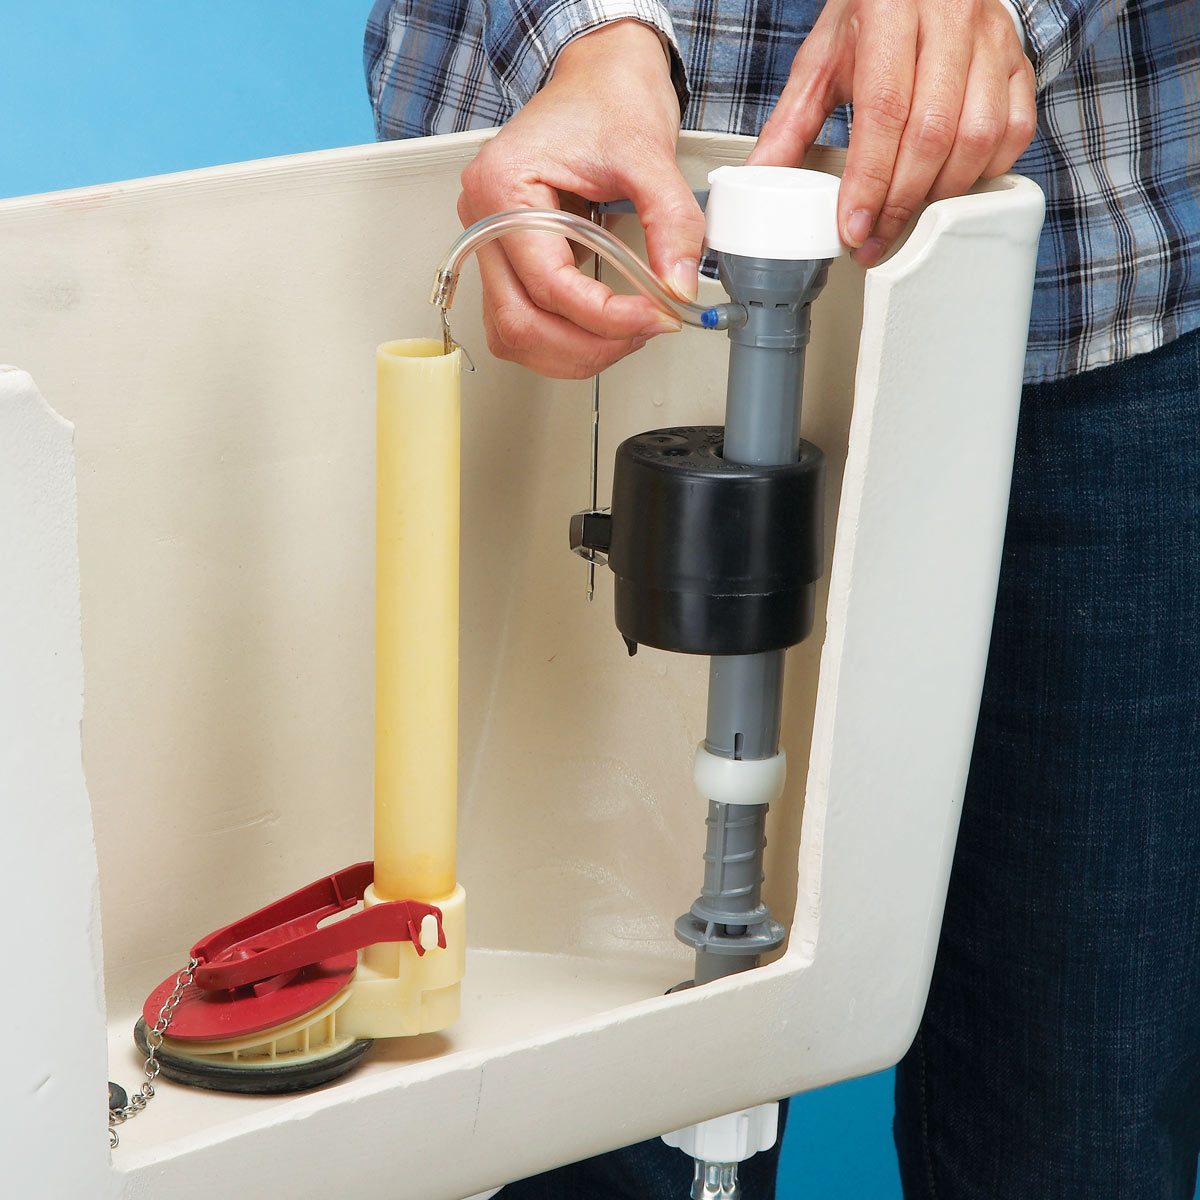
For a toilet overflow tube problem, remove the tank lid and find the fill tube. It’s a small flexible tube that runs from the fill valve to the toilet overflow tube. While the tank refills, this tube squirts enough water down the toilet overflow tube to refill the bowl after the completed flush. If this tube falls off or the water stream misses the overflow tube, the bowl won’t fill and your next flush will be wimpy (that is, won’t develop a strong siphon).
Reattach the fill tube and push it firmly onto the fill valve. Make sure it perches about 1 in. above the rim of the overflow tube and that the fill tube sends water into the toilet overflow tube. Flush the toilet and watch the water stream to make sure it goes down the toilet overflow tube.
Adjust the Fill Height by Checking the Float

The water level in the tank is controlled by an adjustable float. A float that’s set too low produces a weak flush; if it’s set too high, water spills into the toilet overflow tube and the fill valve won’t shut off. The toilet keeps running. To learn how to fix a toilet that won’t flush, look for the fill level mark on the inside back of the tank and mark it on the toilet overflow tube so you can see it more easily. If you can’t find it, measure down about 1 in. on the overflow tube and make a mark.
Then flush the toilet and see if the water reaches and stops at that mark. If not and the toilet keeps running, adjust the toilet tank float up or down. If you have an old toilet, you’ll have to bend the brass rod that connects to the float ball to make adjustments. But with newer toilets, you usually turn a screw or slide a clip along a rod. Flush the toilet after each adjustment. Keep adjusting the float until the water shuts off at the proper level.
Also, make sure that the water level is at least an inch below the C-L (critical level) marked on the fill valve. You can adjust the height of many valves to raise or lower the C-L. Occasionally the fill valve simply won’t shut off, which means that it’s defective. If so, turn the water supply off at the shutoff under the tank. Buy a replacement valve. You don’t have to match the old one; many, like the one shown, fit most toilets. It’s a 15-minute change-out.
Adjust the Flush Handle/Flapper Chain
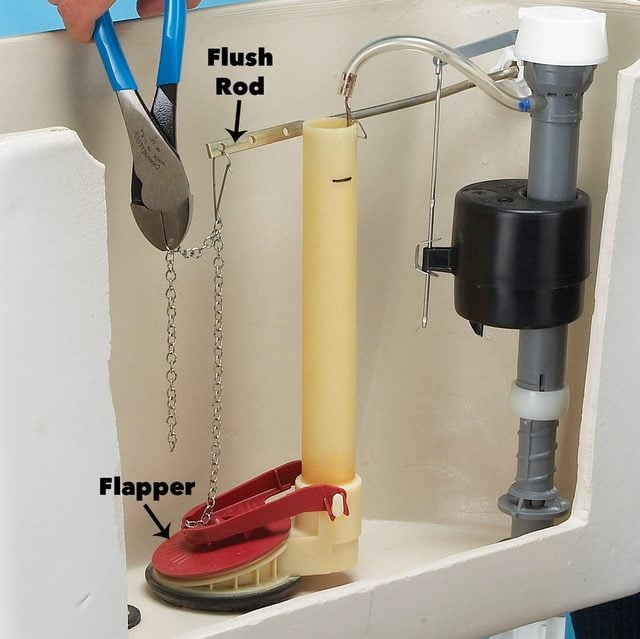
A chain that’s too short or tangled won’t allow the flapper to close and water will continue to leak into the bowl. This causes the fill valve to cycle on and off to refill the tank. A chain that’s too long, or a flush rod that hits the tank lid, won’t open the flapper wide enough to stay open for the full flush. You’ll find yourself having to hold the lever to complete a good flush.
To avoid low water in the toilet bowl and other problems, adjust the linkage in the chain to leave only a slight bit of slack when the flapper is closed. Cut off the excess chain at the rod to leave only about an inch extra to reduce the potential for tangles. Then put the tank lid back on and make sure the flush rod doesn’t strike the lid when you press the lever. If it does, bend it down slightly and readjust the chain.
Replace the Flapper
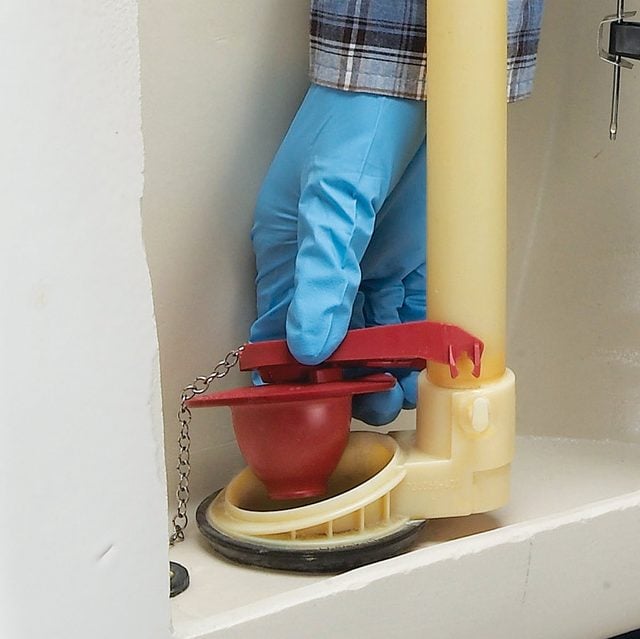
If you’ve completed the first three steps and your toilet keeps running, chances are you have a worn-out flapper. To learn how to stop a toilet from overflowing, turn off the water, remove the old flapper and take it to the store to find an exact replacement. (Hardware stores often carry a wide variety.) Most flappers snap over ears on the overflow tube. Others have a ring that slips over the tube.
Now here’s the catch. You may not find an exact match. The range of flapper styles has mushroomed over the last 15 years, and you may find 15 to 20 flapper options on the store shelf. Some packages include specific brand and model information (so note yours before you leave home). Others have a “universal flapper” label. If you can’t find an exact replacement, try the closest one and pick up a universal type as well. They’re cheap, and the extra one just might save you a second trip to the store! (Avoid the “adjustable” types unless you’re replacing an adjustable one.)
Install the new flapper and make sure it opens and closes freely. Then test it. If the toilet keeps running or runs intermittently, you’re not getting a good seal. Try a different flapper if the toilet won’t stop running.
If you just can’t find a flapper that seals, consider replacing the entire toilet overflow tube/flapper. On most toilets (two-piece), this means removing the tank. It’s not difficult and you don’t need special tools. It’ll take you about an hour, and you’ll avoid that expensive plumber service call.