
13 Tips to Make Painting and Wallpapering Work Go Faster
Updated: Aug. 10, 2023
These tips will make your painting and wallpapering projects go faster and smoother and give you a professional-quality finish you'll be proud of.
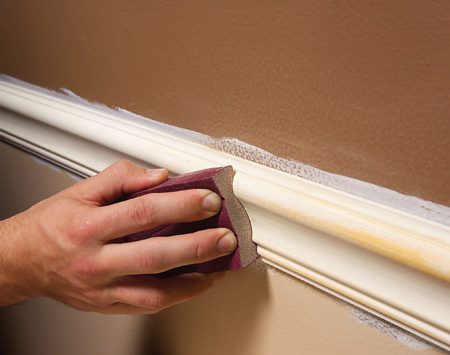
Sand Trim Between Coats for an Ultra-Smooth Finish
One coat of paint usually won’t hide the underlying color and sheen on trim. And if you don’t sand the surface smooth between coats, the finish may have a grainy texture. For a smooth finish, sand the trim before applying each coat of paint. Sand the trim with a fine-grit sanding sponge. Sponges get into crevices where sandpaper can’t go and let you apply even pressure.
Then apply the first coat of paint, let it dry at least 24 hours, lightly sand it again for a completely smooth surface, and apply the second coat. After each sanding, vacuum the trim, then wipe it down with a tack cloth to remove the dust.
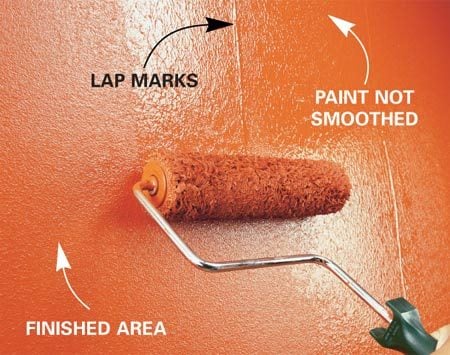
Roll Lightly Without Pressing
Ridges of paint left by the edge of the roller, or lap marks, are a common problem. And if left to dry, they can be difficult to get rid of without heavy sanding or patching. Here are three ways to avoid the problem:
- Don’t submerge the roller in the paint to load it. Paint can seep inside the roller cover and leak out while you’re rolling. Try to dip only the nap. Then spin it against a screen and dip again until it’s loaded with paint.
- Don’t press too hard when you’re smoothing out the paint.
- Never start against an edge, like a corner or molding, with a full roller of paint. You’ll leave a heavy buildup of paint that can’t be spread out. Starting about 6 in. from the edge, unload the paint from the roller. Then work back toward the edge.
Painter’s reminder
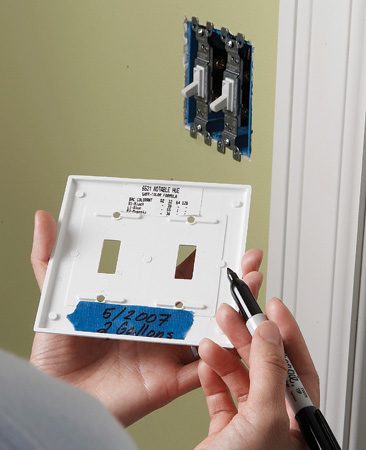
Write Information on the Switch Plate
When you’re finishing a painting project, write on a piece of masking tape the date and how many gallons of paint were needed for the job. Stick the tape to the back of the light switch plate. To get the exact shade next time, also include the color formula sticker peeled off the paint can. When the room’s due for a fresh coat, you’ll be ready to go.
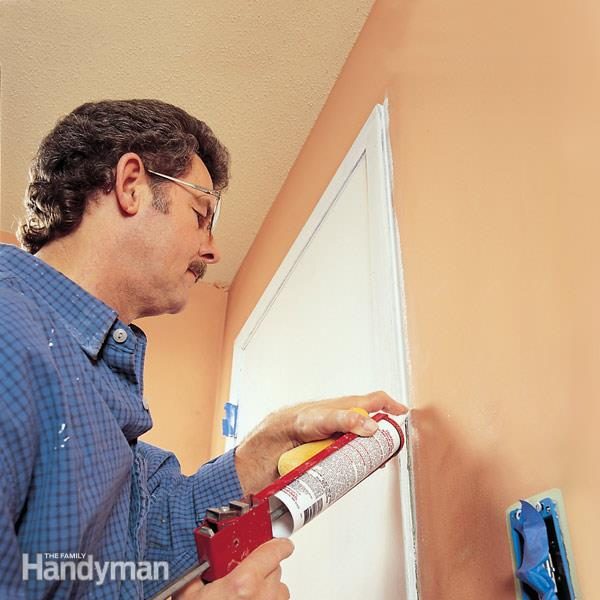
Caulk With a Paintable White Silicone Caulk
Sand the walls with 100-grit sandpaper to remove bumps from the old paint job, rough edges of drywall paper around any gouges and any other imperfections. A drywall sander will make the job easier. Sand primed woodwork with a medium-grit sanding sponge.
Fill any wall blemishes such as nail holes and gouges with a nonshrinking spackling compound and lightly sand after they’re dry. Dust all the woodwork with an old, soft paintbrush or duster. Caulk all wall/woodwork joints with a paintable white silicone/latex caulk. Cut a small (1/8-in.) hole in the end of the nozzle. Wipe off excess and smooth caulk beads with a damp synthetic sponge.
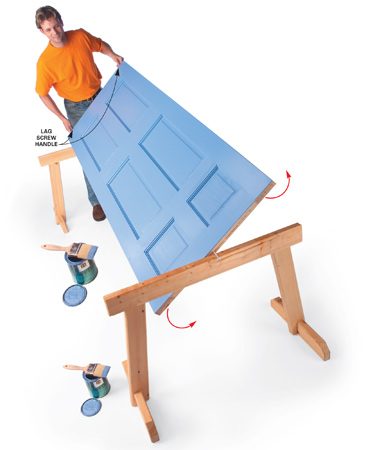
Make a Lag Screw Handle for Easy Flipping
If you have a door that needs painting, you’ll flip for this tip. You’ll be able to paint both sides of the door without waiting for the first side to dry. Rest the door on sawhorses and drive a 1/4-in. x 2-1/2-in. lag screw into each corner of one end and another in the middle of the other end for a pivot.
Slide the sawhorses to each end of the door so the screws rest on the edges of the sawhorses. Paint one side of the door and then, using the two screws as handles, lift and rotate the door on the pivot screw to expose the unpainted side.
Store Cans Upside Down
This will form an airtight seal around the rim. Make sure the cover is on tight to prevent leakage. Hold the can upright and shake it vigorously before you open it so the solids in the paint drop off the lid.
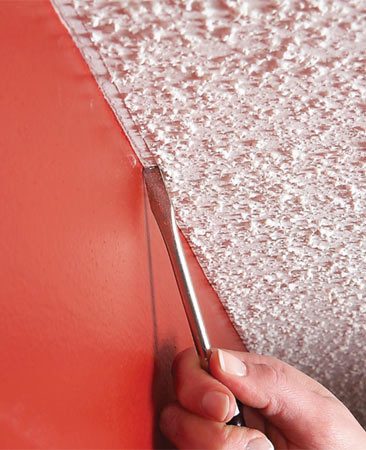
Drag a Flat-Head Screwdriver Along the Ceiling
A neat, straight paint line at the top of a wall is tough to achieve next to a bumpy ceiling. So before you paint, drag a narrow flat-head screwdriver lightly along the ceiling. You’ll get a clean paint line and no one will ever notice that the bumps are missing.
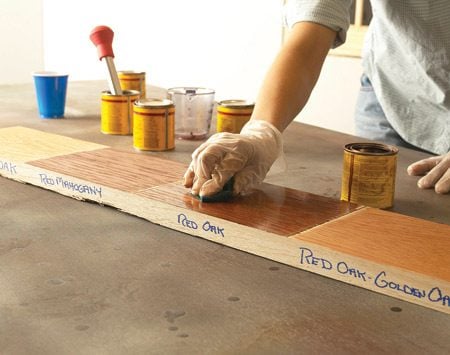
Test Stain Color on Project Scraps
You can’t rely on those stain samples on display in stores. Actual color varies a lot, depending on the type of wood and how you prepare it for finishing. So save scraps from your project, run them through the same sanding process and use them to test finishes. If you didn’t build the item you’re finishing, run tests on an inconspicuous area—the underside of a table, for example. Test stain on scraps to get the color you want.
Leaving excess stain on the wood for longer or shorter periods won’t affect the color much. If it’s a custom color you”e after, you can mix stains of the same brand.
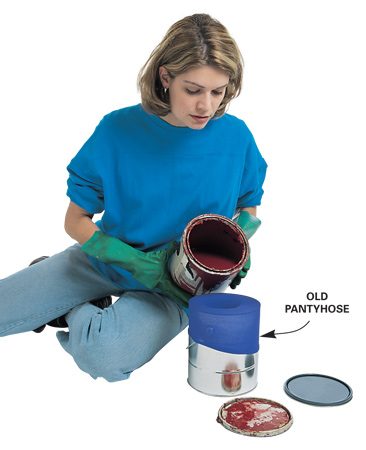
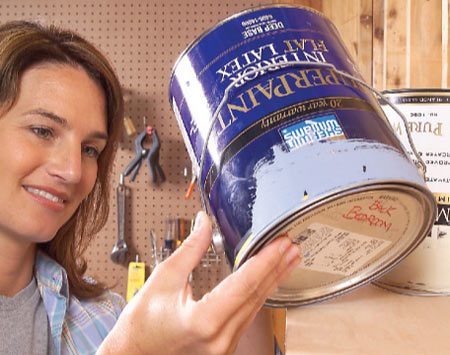
Stretch Pantyhose Over the Paint Can
You probably have a few cans of pricey paint that you’re afraid to use because they contain rust, chips and lumps of hardened paint. Refresh that paint by filtering it through old nylon pantyhose. You can usually get a new empty can from a local paint store for a few bucks.
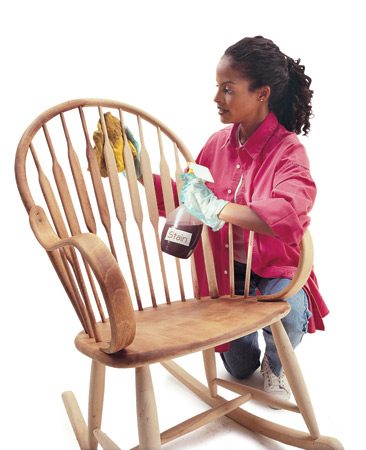
Use a Pump-Type Sprayer to Apply Stain
Save your empty pump-type sprayers that have an adjustable-spray tip and use them to apply stain. Spray a small section at a time, then wipe it. You’ll be surprised how little stain you use to complete the job this way compared with brushing. This technique is especially helpful for applying stain to intricate parts like spindles.
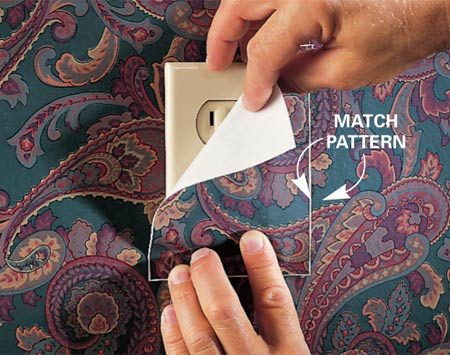
Match Surrounding Pattern
To cover and create outlet or switch plate covers that match the pattern of the surrounding wall, follow these steps: Match the pattern on a scrap piece of wallpaper with that on the surrounding wall.
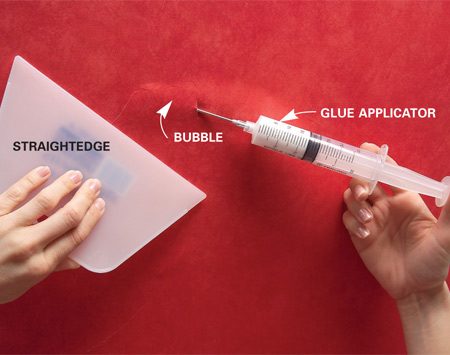
Use Glue Applicator to Apply Adhesive
Fix bubbles in wallpaper by cutting them with a razor knife. A small slit is all that’s needed. Then insert the end of a glue applicator in the slit and squeeze in a little adhesive. Wipe away excessive adhesive with a damp sponge and press the wallpaper against the wall to force out the air, using a plastic straightedge.
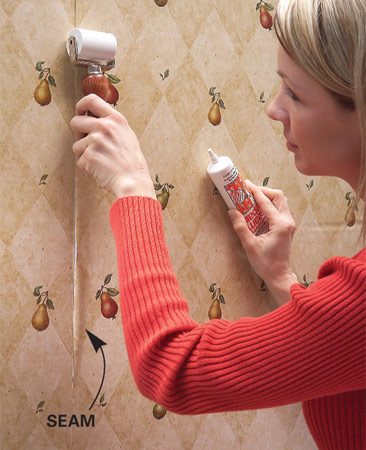
Apply Seam Adhesive Behind Loose Seam
Repairing loose wallpaper seams is fairly simple. Just apply a seam repair adhesive. It provides a solid bond and will keep the seams from coming loose. Squirt the adhesive directly onto the wall behind the loose seams, then press the edges back into place. Use a roller or straightedge as shown to firmly press the paper against the wall and drive out any air bubbles. Wipe away any excess adhesive with a damp sponge.