
How To Clean An Air Conditioning Condenser

Updated: Sep. 11, 2023
Keep things cool and save cash by cleaning your AC condenser. Here's how.

An hour or less
Beginner
Free
Introduction
There's nothing worse than having your air conditioner fail in the summer. To prevent this, be sure your AC condenser is free of dust, dirt and other debris.Tools Required
- Cordless drill
- Hose and spray nozzle
- Screwdriver w/socket
- Soft-bristle brush
Why Is It Important to Clean the Air Conditioning Condenser?
The condenser is the outdoor part of an air conditioner or heat pump. Its role is to transfer heat. In the most basic terms, it pulls heat out of your home in the summer and takes in heat from the atmosphere in the winter to heat your home. If it’s dirty, it can’t efficiently release heat, leading to an air conditioner that won’t cool effectively.
Project step-by-step (5)
Step 1
Cut the Power
- To start this project, disconnect the service at the air conditioner condenser by pulling the plug connector in the power box, or you can also flip the AC breaker switch off in your main breaker panel.


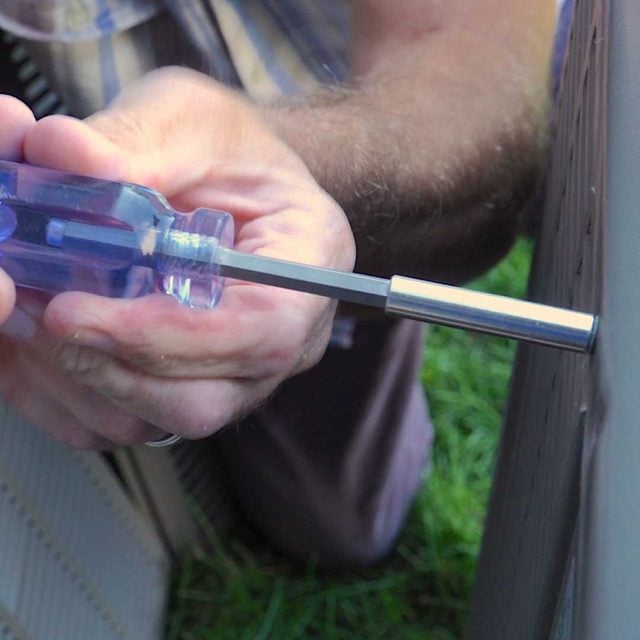
Step 2
Remove the Screws
- Use a cordless drill or screwdriver with a socket to remove the screws.
- Pro tip: Have a container to put the screws in.

Step 3
Remove Panels
- Starting from the back side of the unit, remove the panels one by one, being careful not to damage the condenser fins.
- Pro tip: As you remove the panels, keep them in order so you remember how to put them back.


Step 4
Cleaning the Fins
- Use a soft-bristle brush or a hose with a spray nozzle to clean the fins.
- Pro tip: Always brush up and down, never side to side. And spray the water from the top, not straight on the fins.


Step 5
Re-install Panels
- Re-install the panels in the reverse order you removed them. Use a screwdriver. Leave the screws loose until all the panels are in, then tighten the screws. Here are a few tips for cleaning the central air conditioner unit.
- Pro tip: Depending on the unit, it may help to install the corner panels first before the flat panels.

Originally Published: August 13, 2020