DIY Garden Closet Storage Project
Updated: Apr. 18, 2024
Multiple Days
Intermediate
$101–250
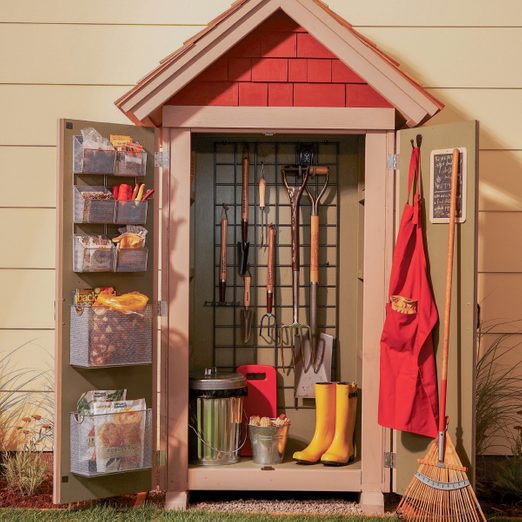
Introduction
This outdoor shed/closet is small, but compact. It'll hold most of your gardening and lawn care tools and supplies and keep them close at hand and well organized.Tools Required
- Brad nail gun
- Caulk gun
- Circular saw
- Drill bit set
- Drill/driver - cordless
- Framing square
- Hammer
- Miter saw
- Speed square
- Straightedge
- Tape measure
- Wood chisel
If you don’t have room in your yard for a large, freestanding shed, you can still create plenty of space for garden tools with a shed attached to the back or side of the house. If you’re an experienced builder, you can build this shed in a couple of weekends. Ours cost about $400, but you could save about $75 by using treated lumber, pine, and asphalt shingles instead of cedar.
The shed is made from three components—the roof, the walls and the doors, with edges covered by trim boards.
Project step-by-step (5)
Step 1
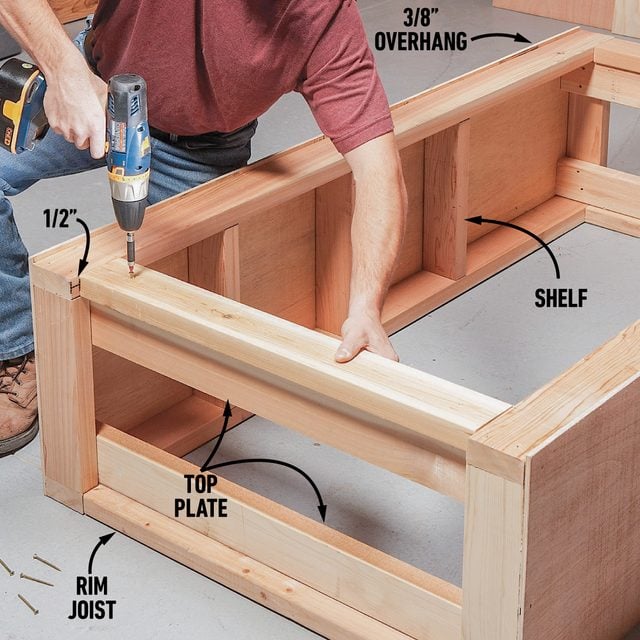
Assemble the Walls
- Nail together the side walls, then square them with the plywood side panels.
- Pro tip: Overhang the panels 3/8 in. at the front—this will hide the gap at the corner when you hang the doors.
- Join the two sides with the top and bottom plates and rim joists.
- Note: The sides, top and bottom are all mirror images of each other except for the top front rim joist, which is set down 1/2 in. from the top so it stops the doors.
- Use screws to fasten the framework together except in the front where fasteners will be visible—use 2-1/2-in. casing nails there.
- Screw the 4×4 footings to the bottom plates, then nail on the plywood base.
Step 2
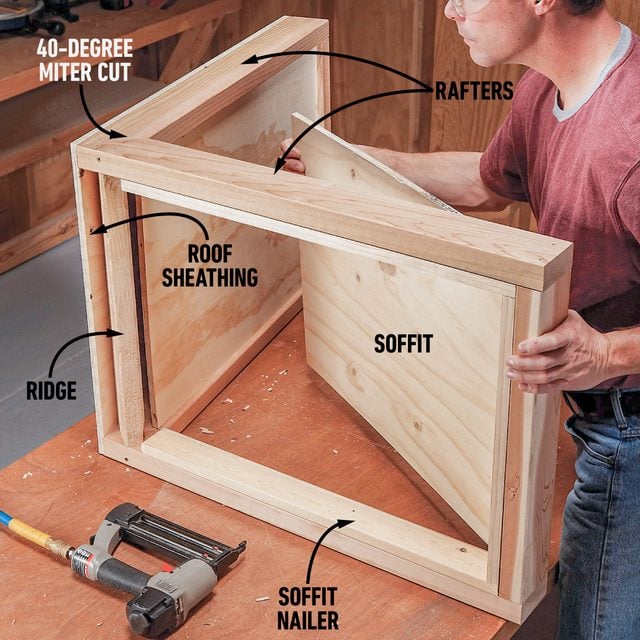
Assemble the Roof
- Cut and screw together the two pairs of rafters, then nail on the fascia and ridge boards.
- Nail on the roof sheathing and the soffit, butting the corners together.
- Screw on the collar ties, then screw on the front and rear nailers.
- Nail the roof trim on, staple on a layer of roofing felt, then shingle the roof.
- Pro tip: If you use cedar shingles, fasten them with narrow crown staples or siding nails. Leave 1/8-in. to 1/4-in. gaps between cedar shingles for expansion, and nail a strip of aluminum flashing across the ridge under the cap shingles.
Step 3
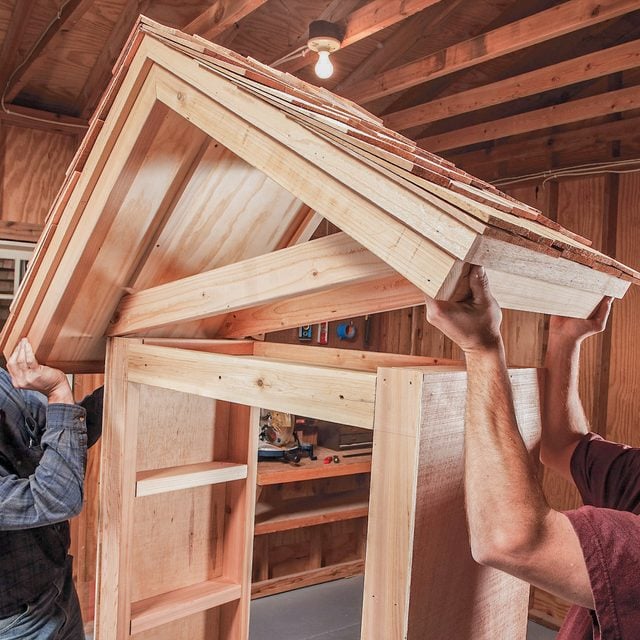
Install the Roof
- Tip the shed upright, then set the roof on, aligning the front collar tie with the front rim joist and centering it side to side.
- Nail the cedar trim to the sides, aligning the 1x3s on the sides with the overhanging edge of plywood along the front edge.
- Glue and screw on the back and front siding panels to join the roof and base together.
- Use the back panel to square the structure and make it rigid.
Step 4
Trim the Front and Hang the Doors
- Nail on the front trim piece, aligning it with the horizontal side battens.
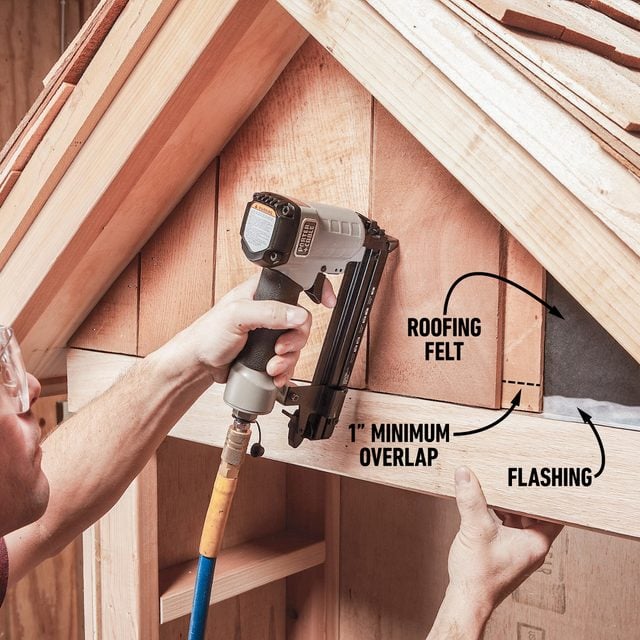
- Attach flashing and felt to the front panel, then cover it with cedar shakes.
- Finally, construct the doors per the plans, cut the hinge mortises (see below) and hang the doors.
- Leave a 1/8-in. gap between the doors and trim along the top.
- Paint or stain if desired, then set the shed against the house on several inches of gravel.
- Pro tip: Add or take away gravel under the footings until the shed is tight against the siding and the gap above the doors is even.
- Screw the shed to the studs in the wall to keep it from tipping.
- Drill two 1/2-in. holes for the screws through the plywood near the rim joists, then loosely fasten the shed to the wall with 2-1/2-in. screws and large fender washers so the shed can move up and down when the ground freezes and thaws.
Step 5
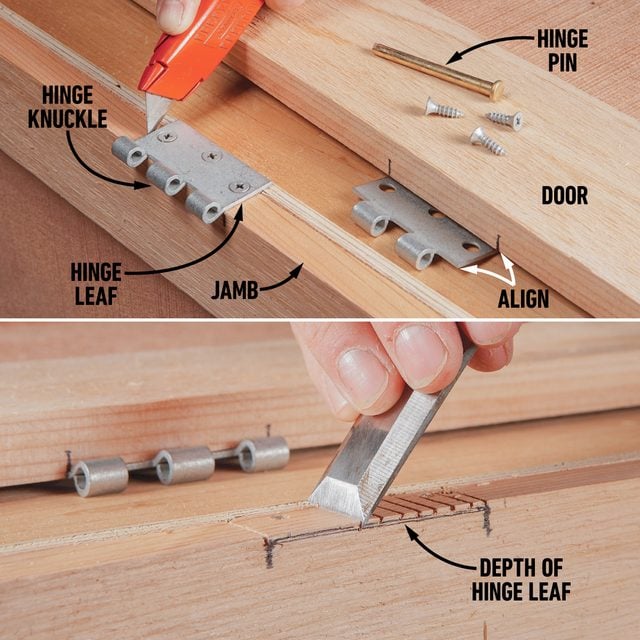
How to Mortise a Hinge
- Mark the hinge locations on the door jamb, then on the door, less 1/8 in. for clearance at the top of the door.
- Separate the hinge leaves, then align the edge of the leaf with the edge of the door or jamb.
- Predrill and fasten the leaf, then cut along all three edges with a razor knife to about the same depth as the hinge leaf.
- Remove the hinge and make a series of angled cuts to establish the depth of the mortise.
- Pro tip: Turn the chisel over and clean out the chips using light hammer taps.
- Holding the chisel with the beveled front edge against the wood, chip out the 1/4-in. sections.
- Check the fit of the hinge leaf and chisel out additional wood until the leaf sits flush.
- Note: If the hinges don’t fit back together perfectly when you hang the door, tap the leaves up or down (gently) with a hammer.