
Bookcase and Shelf Tips
Updated: Feb. 01, 2023Building beautiful bookcases and shelving units doesn't have to be hard. Here are some of our favorite ways to simplify building storage units and get gorgeous results.
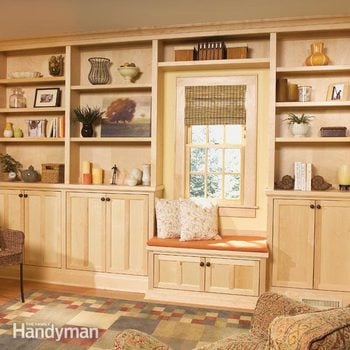
Save time with store-bought cabinets
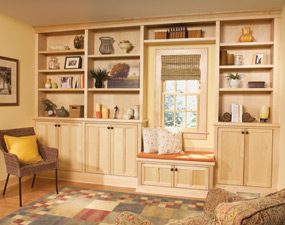
Standard kitchen cabinets make it easy
Building and hanging cabinet doors is a fussy, time-consuming job. To avoid the hassle, buy standard kitchen cabinets and build around them. The inexpensive cabinets we chose for this bookcase cost about $150 more than building doors and boxes from scratch. Considering the huge time savings, that’s a bargain. The main disadvantage of store-bought cabinets is that almost all are prefinished. So you’ll have to find a matching stain and clear coating to finish the parts you’ve built from scratch.
Dress it up with plastic trim
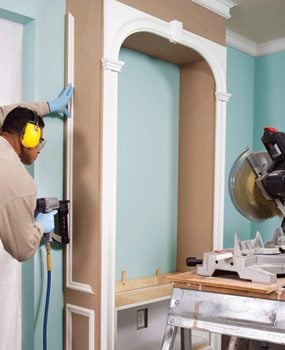
Polyurethane trim adds easy elegance
Add curves and other fancy touches to your bookcase the easy way with polyurethane plastic trim. Working with polyurethane trim is much like working with wood—you cut it with standard saw blades, nail it by hand or with a gun and paint it just like wood. Home centers carry a small selection of polyurethane trim. You can find an endless variety of options by going online and searching for “polyurethane trim” (some products are listed as “urethane” rather than “polyurethane”).
Protect against tipovers
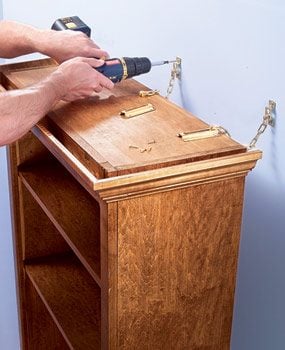
Anchor your bookcase to the wall
Screwing your bookcase to the wall studs is one way to anchor your bookcase so it can’t tip over and injure someone. Just make sure to load up the bookcase with books so it fully compresses the carpet before you drive the screws. If you want to be able to move the bookcase without removing screws, pick up a couple of chain latches ($5 each). Fasten the chains to studs with 2-1/2-in. coarse-thread screws. Position the tracks so there will be just enough slack in the chains for you to detach them.
Cover plywood edges fast
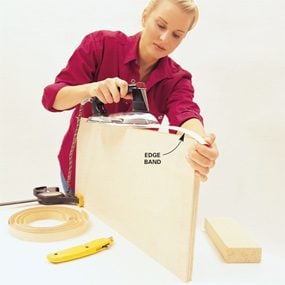
Iron on edge banding
Plywood is an essential material for bookcases. It’s strong, affordable and good looking. There’s just one problem: those ugly edges. You can hide edges behind solid wood or moldings, but the quickest, easiest edge solution is a thin strip of wood veneer called “edge banding” ($6 for 25 ft. at home centers). The process couldn’t be simpler: You just iron on the adhesive-backed veneer and trim off the excess.
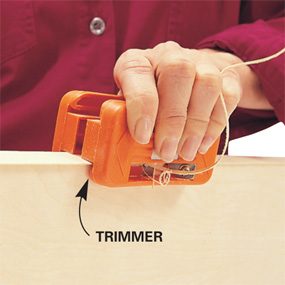
Trim with a special edge band trimmer
You can trim with a utility knife, but that requires a steady hand, and any wrong move creates a wavy edge. An edge band trimmer ($20) eliminates mistakes and does the job much faster. To buy one online, search for “edge band trimmer.” Complete edge-banding instructions here.
Adjustable bookshelves simplify building
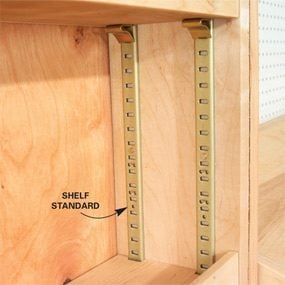
Bookcase with Adjustable Shelves: Easier to build than fixed shelves
Adjustable shelves beat fixed box shelves in just about every way. They make storage and display space more versatile, of course. And they’re usually just slabs of plywood nosed with strips of wood or edge banding, so they’re easy to make. And because you can remove them, adjustable shelves simplify staining and finishing. The easiest way to support adjustable shelves is by using shelf standards are ($3 for 6 ft. at home centers). Just screw them into place and you’re done.
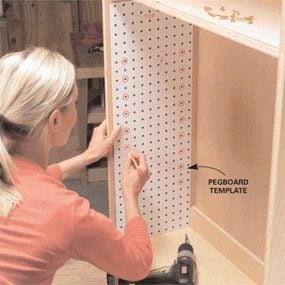
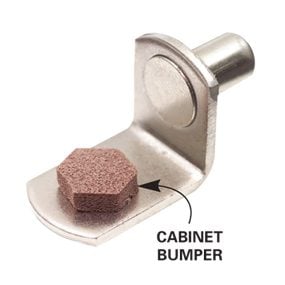
Peg-type supports dress up plain shelves
For a more elegant look, use peg-type shelf supports. Drilling dozens of holes takes a while, but a scrap of pegboard makes positioning the holes easy. If you don’t like the look of all those holes, drill only where you plan to place shelves. That way the holes will be hidden. If you want to move shelves later, you can drill new holes and hide the old ones with wood filler.
Perfect cuts every time with a sled
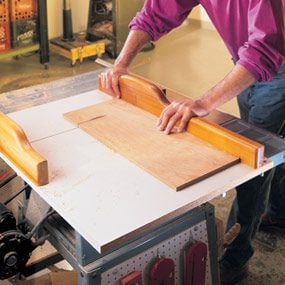
A sled guarantees clean, exact cuts
A sled will turn your table saw into a crosscutting and mitering machine. You can build one, plus a miter-cutting attachment, in a couple of hours.
If you already have a miter saw, you’re probably wondering, “Why bother?” Because no miter saw can match the reliable accuracy of a sled. A sled gives you consistent, clean and exact cuts and it crosscuts stock up to 19 in. wide—perfect for shelves and other wide parts.
Two-story closet shelves
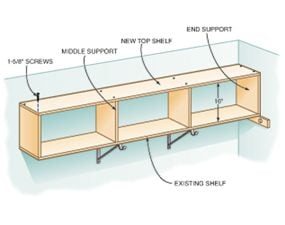
Add a high closet shelf
There’s a lot of space above the shelf in most closets. Even though it’s a little hard to reach, it’s a great place to store seldom-used items. Make use of this wasted space by adding a second shelf above the existing one. Buy enough closet shelving material to match the length of the existing shelf plus enough for two end supports and middle supports over each bracket. Twelve-inch-wide shelving (about $9 for an 8-ft. length) is available in various lengths and finishes at home centers and lumberyards.
Closet nook shelves
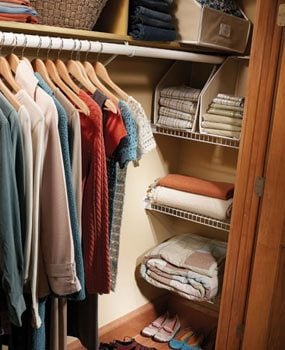
Add shelves in recessed closet corners
Salvage the hidden space at the recessed ends of your closets by adding a set of shelves. Wire shelves are available in a variety of widths. Measure the width and depth of the space. Then choose the correct shelving and ask the salesperson to cut the shelves to length for you or cut them yourself with a hacksaw. Subtract 3/8 in. from the actual width to determine the shelf length. Buy a pair of end mounting brackets and a pair of plastic clips for each shelf.
