
8 Tips for Drilling Concrete and Installing Fasteners
Updated: Mar. 08, 2024
Anchor objects to concrete quickly and securely.
What Concrete Fasteners Are and How to Use Them
Concrete fasteners, like screws or bolts, feature alternating high and low threads or driving into hard materials. Concrete bits also have super-hard carbide tips.
Fastening to concrete is not the same as attaching something to wood, drywall or a softer material. It’s generally more difficult and requires speciality tools and materials.
To fasten to concrete, you must:
- Drill a pilot hole, unless the screw can go in without one. The hole should be at least 1/4-in. deeper than the screw length.
- Drive the fastener into the hole with a drill or other driving tool.
- Be sure the fastener is snug against the concrete and doesn’t wiggle.
It’s crucial the pilot hole not be too large, or the fastener will be too loose and won’t sink properly. Also, an inexpensive or older drill might not be powerful enough to drill into concrete.

Buy Various Concrete Screw Lengths
Buy different lengths so you have the correct screw size on hand. Select one that will penetrate concrete at least one inch. Add one inch to the thickness of the material to determine the minimum length of screw needed. In hard, dense materials like concrete or stone, a one-inch embedment will work fine.
For maximum strength, use longer screws, up to 1-3/4-in. embedment, in soft brick or other less dense materials. You may need to experiment to find the right screw that goes in fully and holds securely.

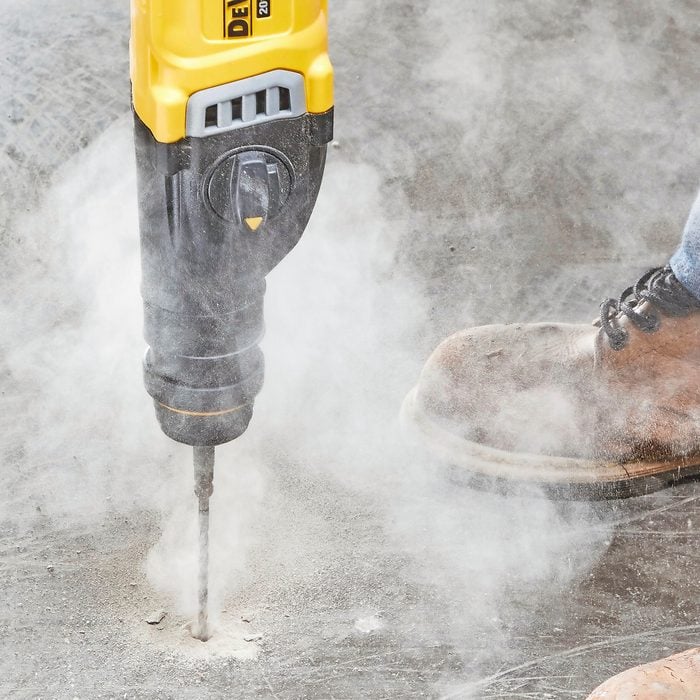
Drill the Hole Deep Enough
Holes for concrete screws should be at least 1/4-in. deeper than the screw will penetrate to allow a little extra space for dust accumulation. (See above.)
But it’s not always easy to judge how deep you’re drilling. Too shallow and the screw won’t go in, and drilling deeper than necessary is a waste of time and effort. That’s why most hammer drills come with an adjustable depth stop.
Troubleshooting
If you’re having trouble driving the screw all the way, first make sure the hole is deep enough. If it is and you’re still having trouble, there’s probably too much grit in the hole.
Remove the screw and clean out the hole by running the bit in and out a few times. Try driving the screw again. If it’s still stubborn, back it out and redrive it a few times. If all else fails, install another screw a few inches away. Finally, consider a little shorter screw for the rest of the holes.
Sometimes you’ll have the opposite problem — the screw will spin without gripping. If this happens, the material you’re trying to fasten to is probably too soft or crumbly. Try a longer screw. If you’re using a 3/16-in. screw, try 1/4-inch. You may need a concrete anchor that expands as you tighten the fastener.

Screws for Most Light- to Medium-Duty Tasks
Most concrete screws are 3/16 in. or 1/4 in. in diameter. The 3/16-in. screws are plenty strong for most home tasks like installing furring strips, fastening walls to concrete floors, and attaching hardware to block or brick. The 3/16-in. size is usually the better choice since they’re a little cheaper and easier to drill.
If the 3/16-in. screws are snapping off because the concrete is too hard, switch to stronger 1/4-in. screws. You could also keep some 1/4-in. screws handy in case you strip out the hole for a 3/16-in. screw. Switch to 1/4-in. screws for heavy-duty work like securing a wall cabinet to a concrete or block wall, or supporting shelving that will hold a lot of weight.

Use a Hammer Drill
In some less dense materials like soft brick, you can drill pilot holes with a carbide-tipped bit in a regular drill. But in most cases, you’ll need a hammer drill.
Precisely sized carbide-tipped bits are often included with packs of screws, or you can purchase one separately. Match the bit to the size screw you’re using: a 5/32-in. bit for 3/16-in. screws, and a 3/16-in. bit for 1/4-inch. Keep a spare bit on hand, since the tip can wear out rapidly in some hard materials, creating a hole that’s too small. One indication of a worn bit: Difficulty driving screws completely.

Use Hex Head Screws Where Appearance Isn’t an Issue
Concrete screws com with flat, Phillips or hex heads. In situations where the screw head must be flush to the surface (furring strips under drywall), or where a Phillips head would look nicer, use the Phillips head screws. Otherwise, always pick the hex head screws.
The positive engagement of the hex bit makes them easier to drive. You’ll need a 1/4-in. hex driver for the 3/16-in. screws and a 5/16-in. driver for the thicker 1/4-in. screws.
When you’re using Phillips head screws, keep extra No. 2 Phillips head bits on hand (No. 3 for 1/4-in. screws). The hardened screws wear out bits quickly.

Drill With a Firm Hand and Maintain Steady Pressure
Good technique is essential for driving concrete screws. Not enough downward pressure and the bit could slip off the head, especially with Phillips head screws. For best results, keep constant pressure on the screw and run the drill at slow to medium speed.
It takes a light touch to avoid snapping screws. Heavy-duty drills work best because they maintain a steady slow speed. Stop as soon as the screw is flush to the surface and your material is firmly attached. Driving at high speeds overdrives the screw, stripping the threads or breaking off the head. You’ll develop a feel for the right speed after driving a few screws.
Ease off the driving speed as the screw head nears the surface.

Use Two Drills or Buy an Installation Kit
Install the masonry bit in your hammer drill and a driver bit in a variable speed drill. Then you won’t have to switch bits constantly.
Another option is buying an installation tool. It lets you to switch quickly from drilling to driving mode and back again. It includes Phillips and hex head bits to drive 3/16-in. and 1/4-in. screws.
A kit contains a carbide-tipped bit (replaceable) a hex driver and a Phillips driver.

Keep a Handful of Plastic Anchors in Case of Strip-Out
Occasionally, the threads of a screw won’t grip and the screw will spin in the hole. Usually you can just abandon this hole and drive another screw a short distance away. But if relocating the screw isn’t a good option, simply enlarge the hole and slip in a plastic anchor. Then drive the concrete screw into the anchor.
Sleeve anchors for concrete block
Fastening heavy items to concrete block is simple if you use the right tools and fasteners. Most people mess up thinking they can use plastic anchors. Uh, no. At the least you should use a lag shield. But even then, choose that type of anchor only when mounting to one of the three solid sections of the block.
Sleeve anchors are a better option because they work in the solid and hollow sections of the block, as well as the mortar joints. Here are two important tips when you’re installing sleeve anchors:
- Leaving drilling dust in the hole will reduce the fastener’s holding power. So remove it with a vacuum or blower. A baby’s ear syringe works great for this (keep one in your toolbox). Just shove it into the hole and puff out the dust.
- Protect the bolt threads by unscrewing the nut until it extends slightly past the bolt threads. Then drive it home with light hammer blows.